
Building your own balance board for a standing desk
- Finished product
- Materials needed
- Buy vs build
- Standing desk use vs surfboard training use
- Step 1: Gather the materials
- Step 2: Cut out the balance board
- Step 3: Add the stopper blocks
- Step 4: Coat the board with polyurethane
- Step 5: Cut the PVC pipe
- Step 6: (Optional) Apply rubber mat to the board
- Other notes and observations
Oct 2023 update: If you’re thinking about getting or making a balance board for a standing desk, consider trying the Movemate standing board instead. Since writing this post, I’ve switched to using Movemate almost exclusively instead because it offers more movement possibilities.
This is the first balance board I’ve made, so take my approach with a grain of salt here. I’m not an experienced balance board DIYer. But the board I created seemed to work extremely well.
Finished product
Here’s what you’ll be building:
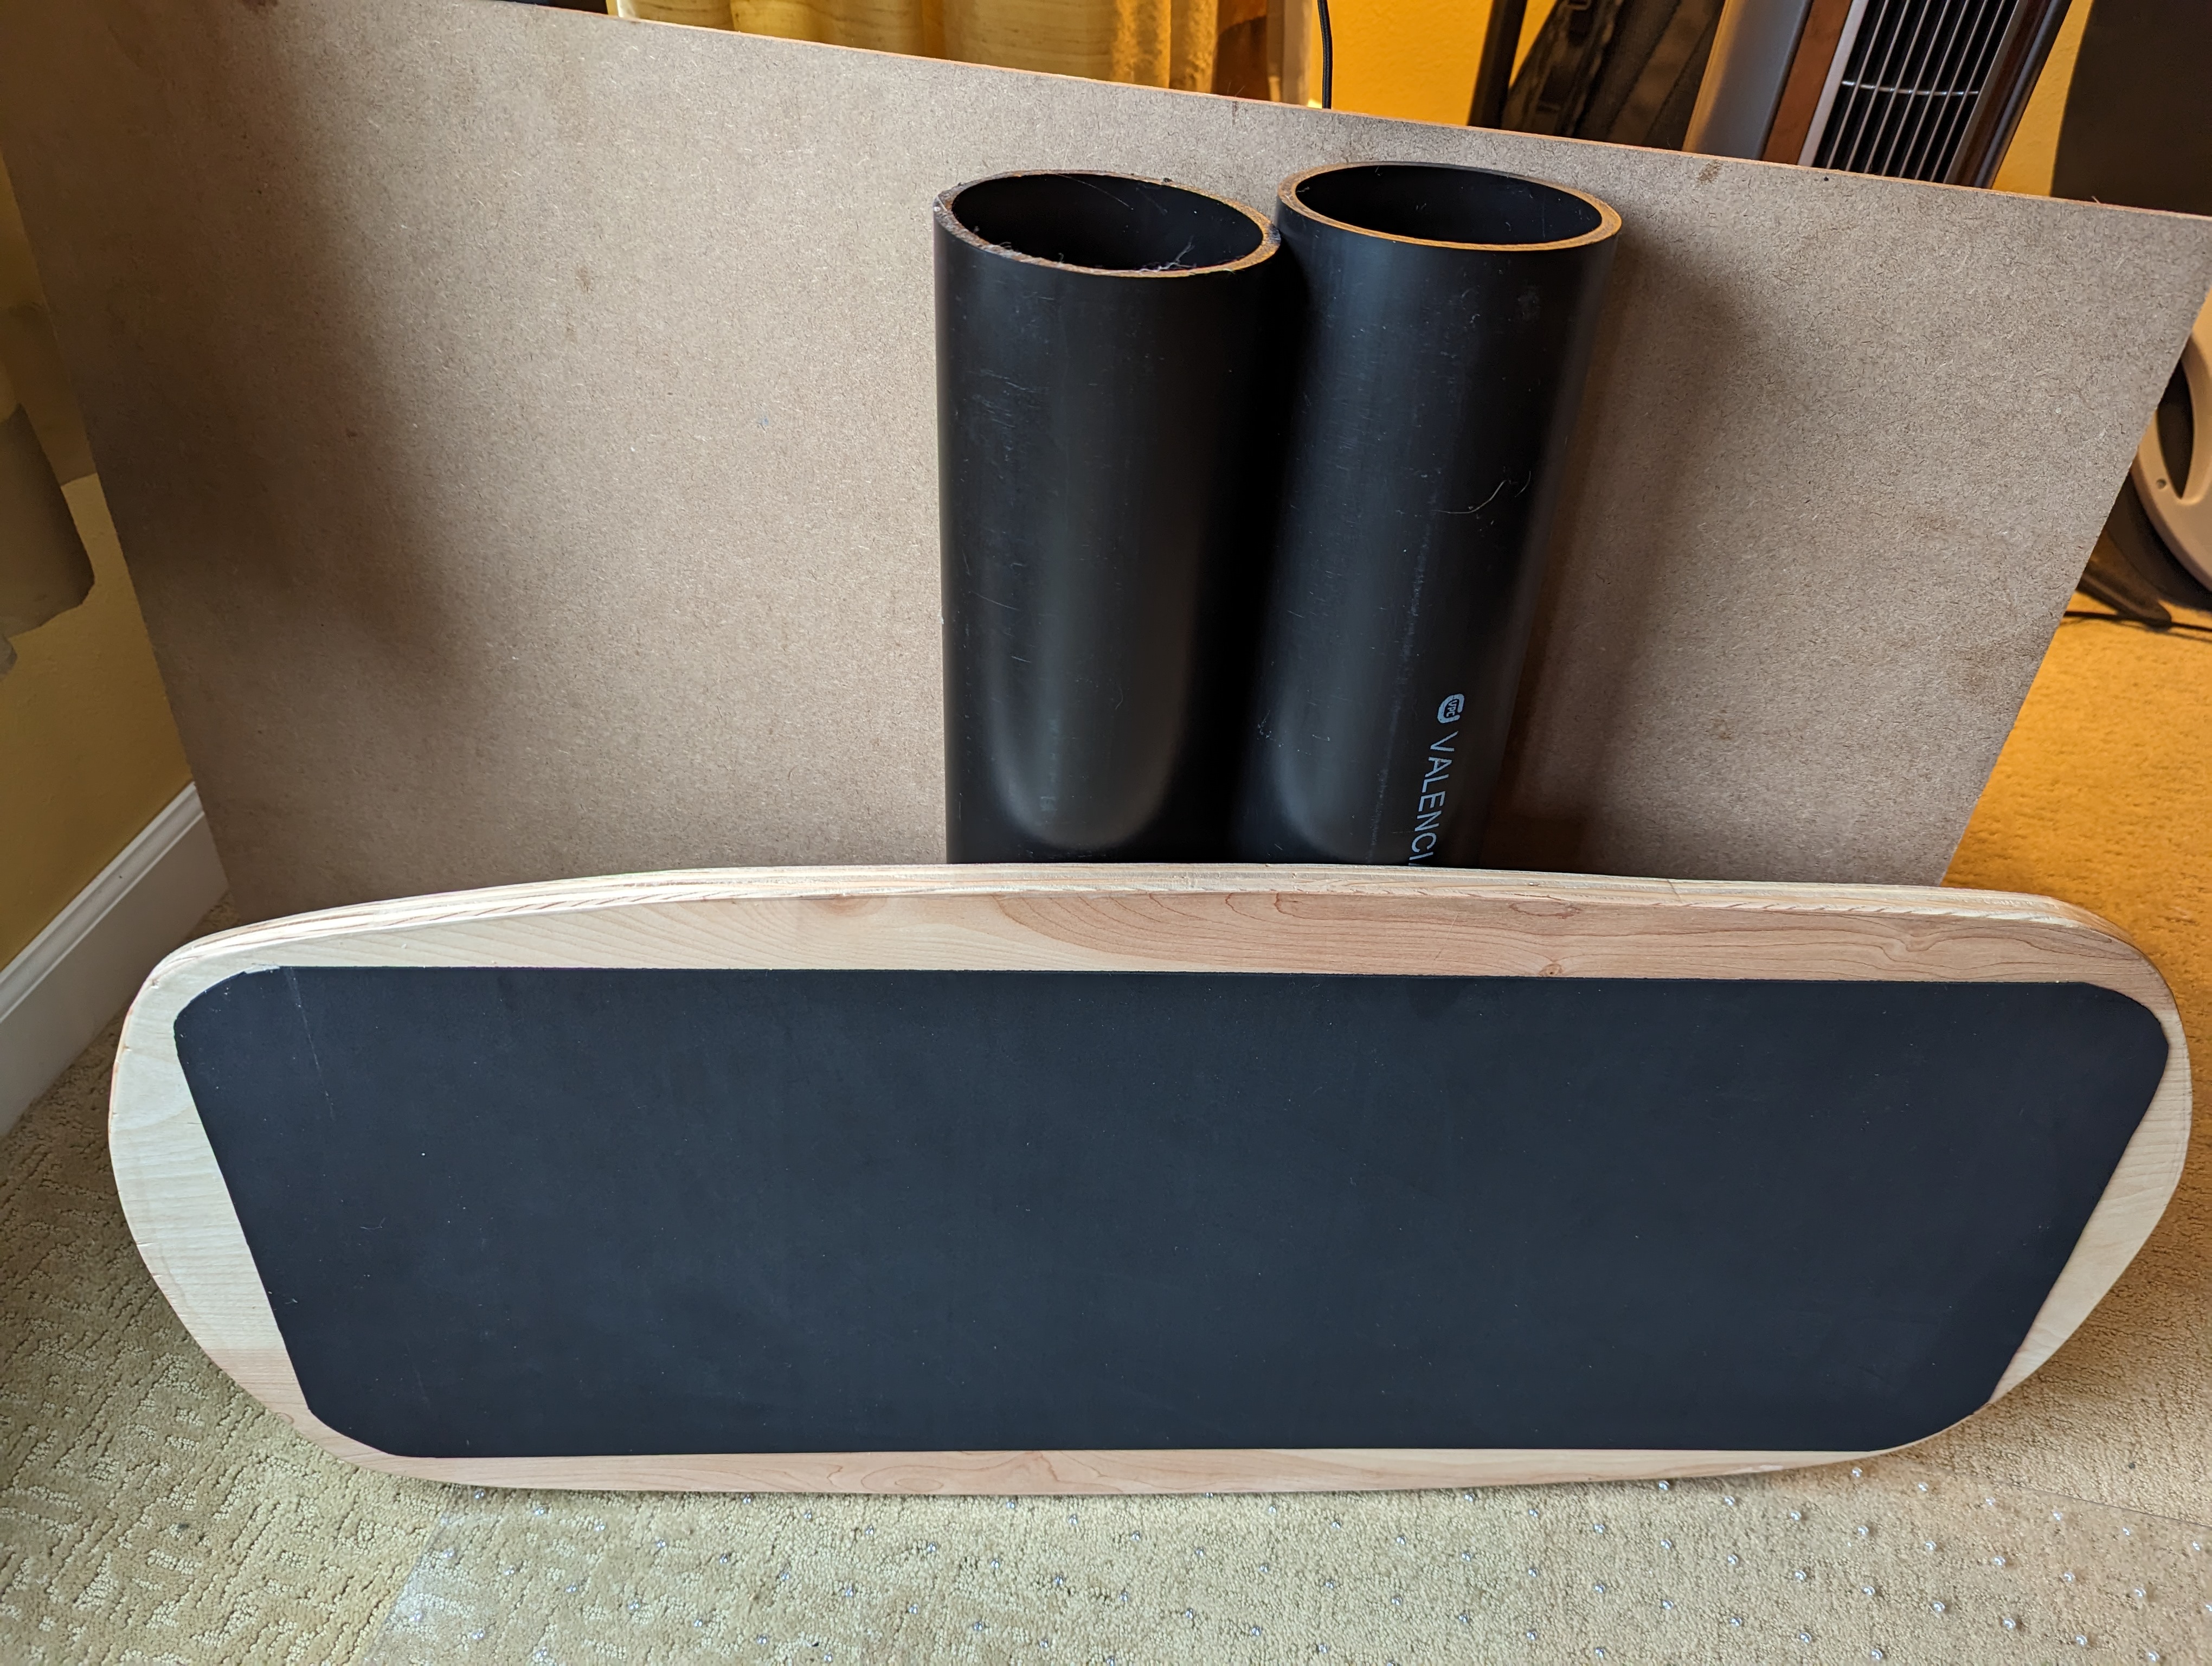
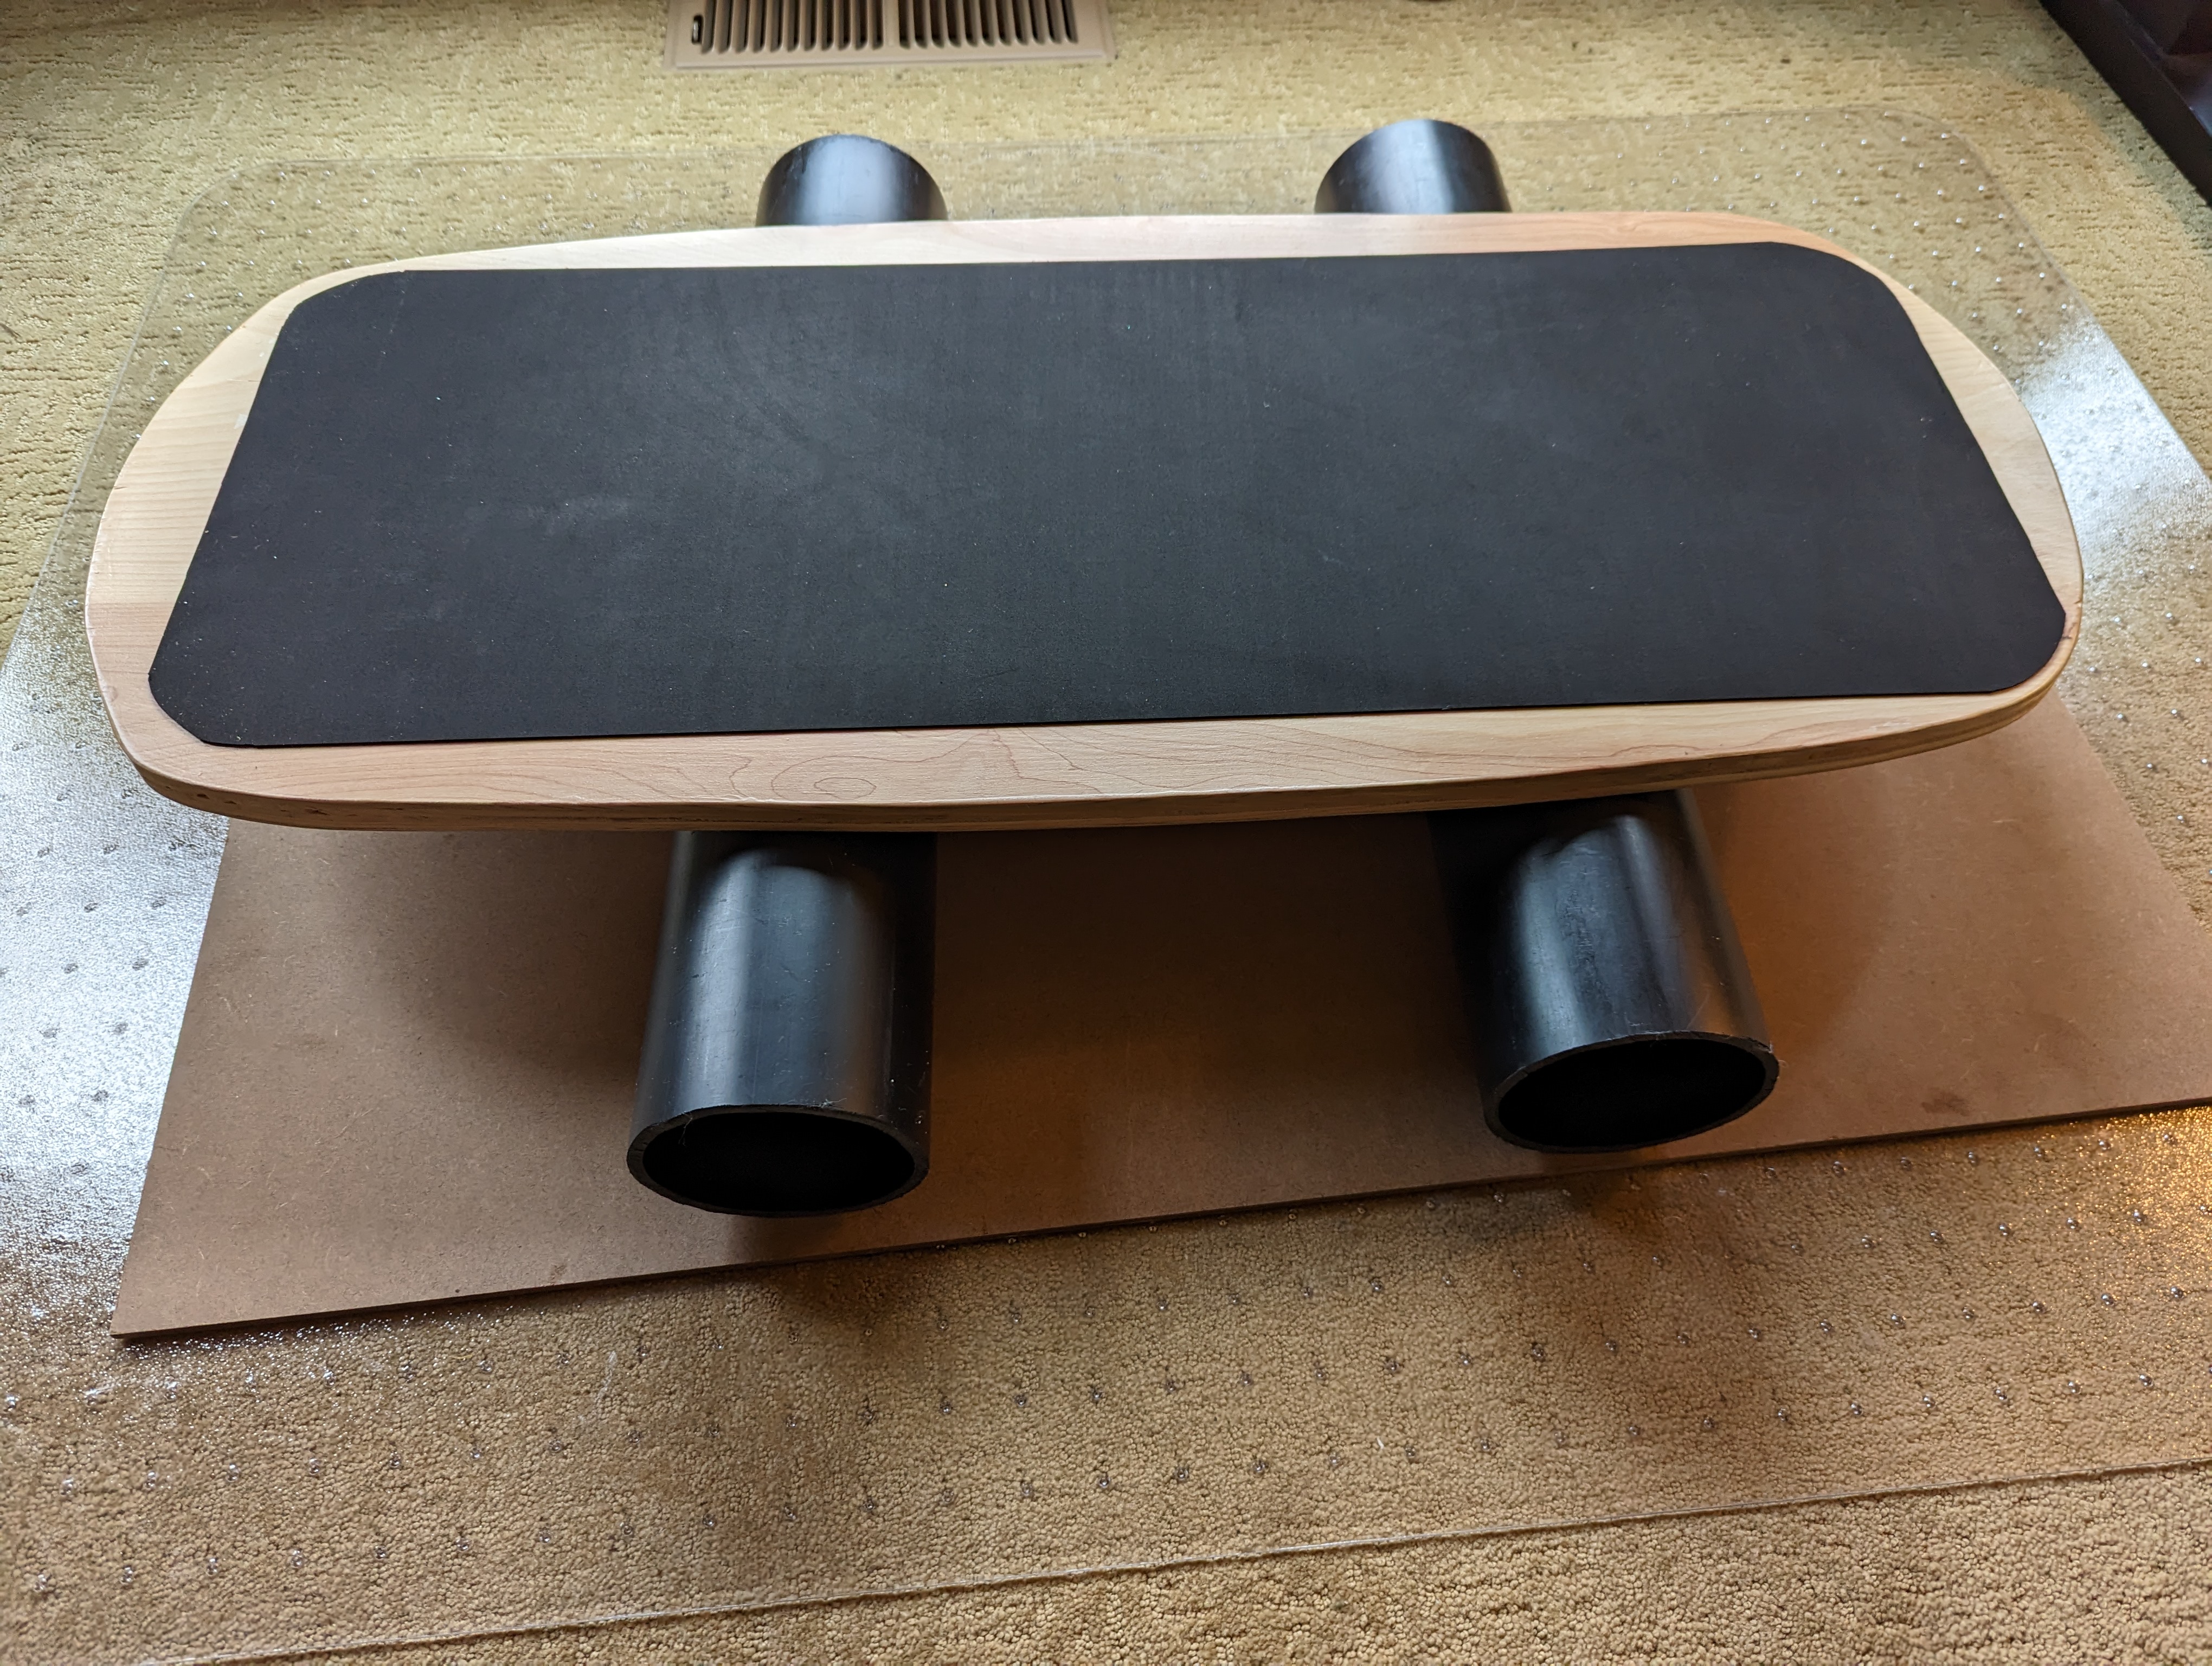
This will give you two options. A single roller option:
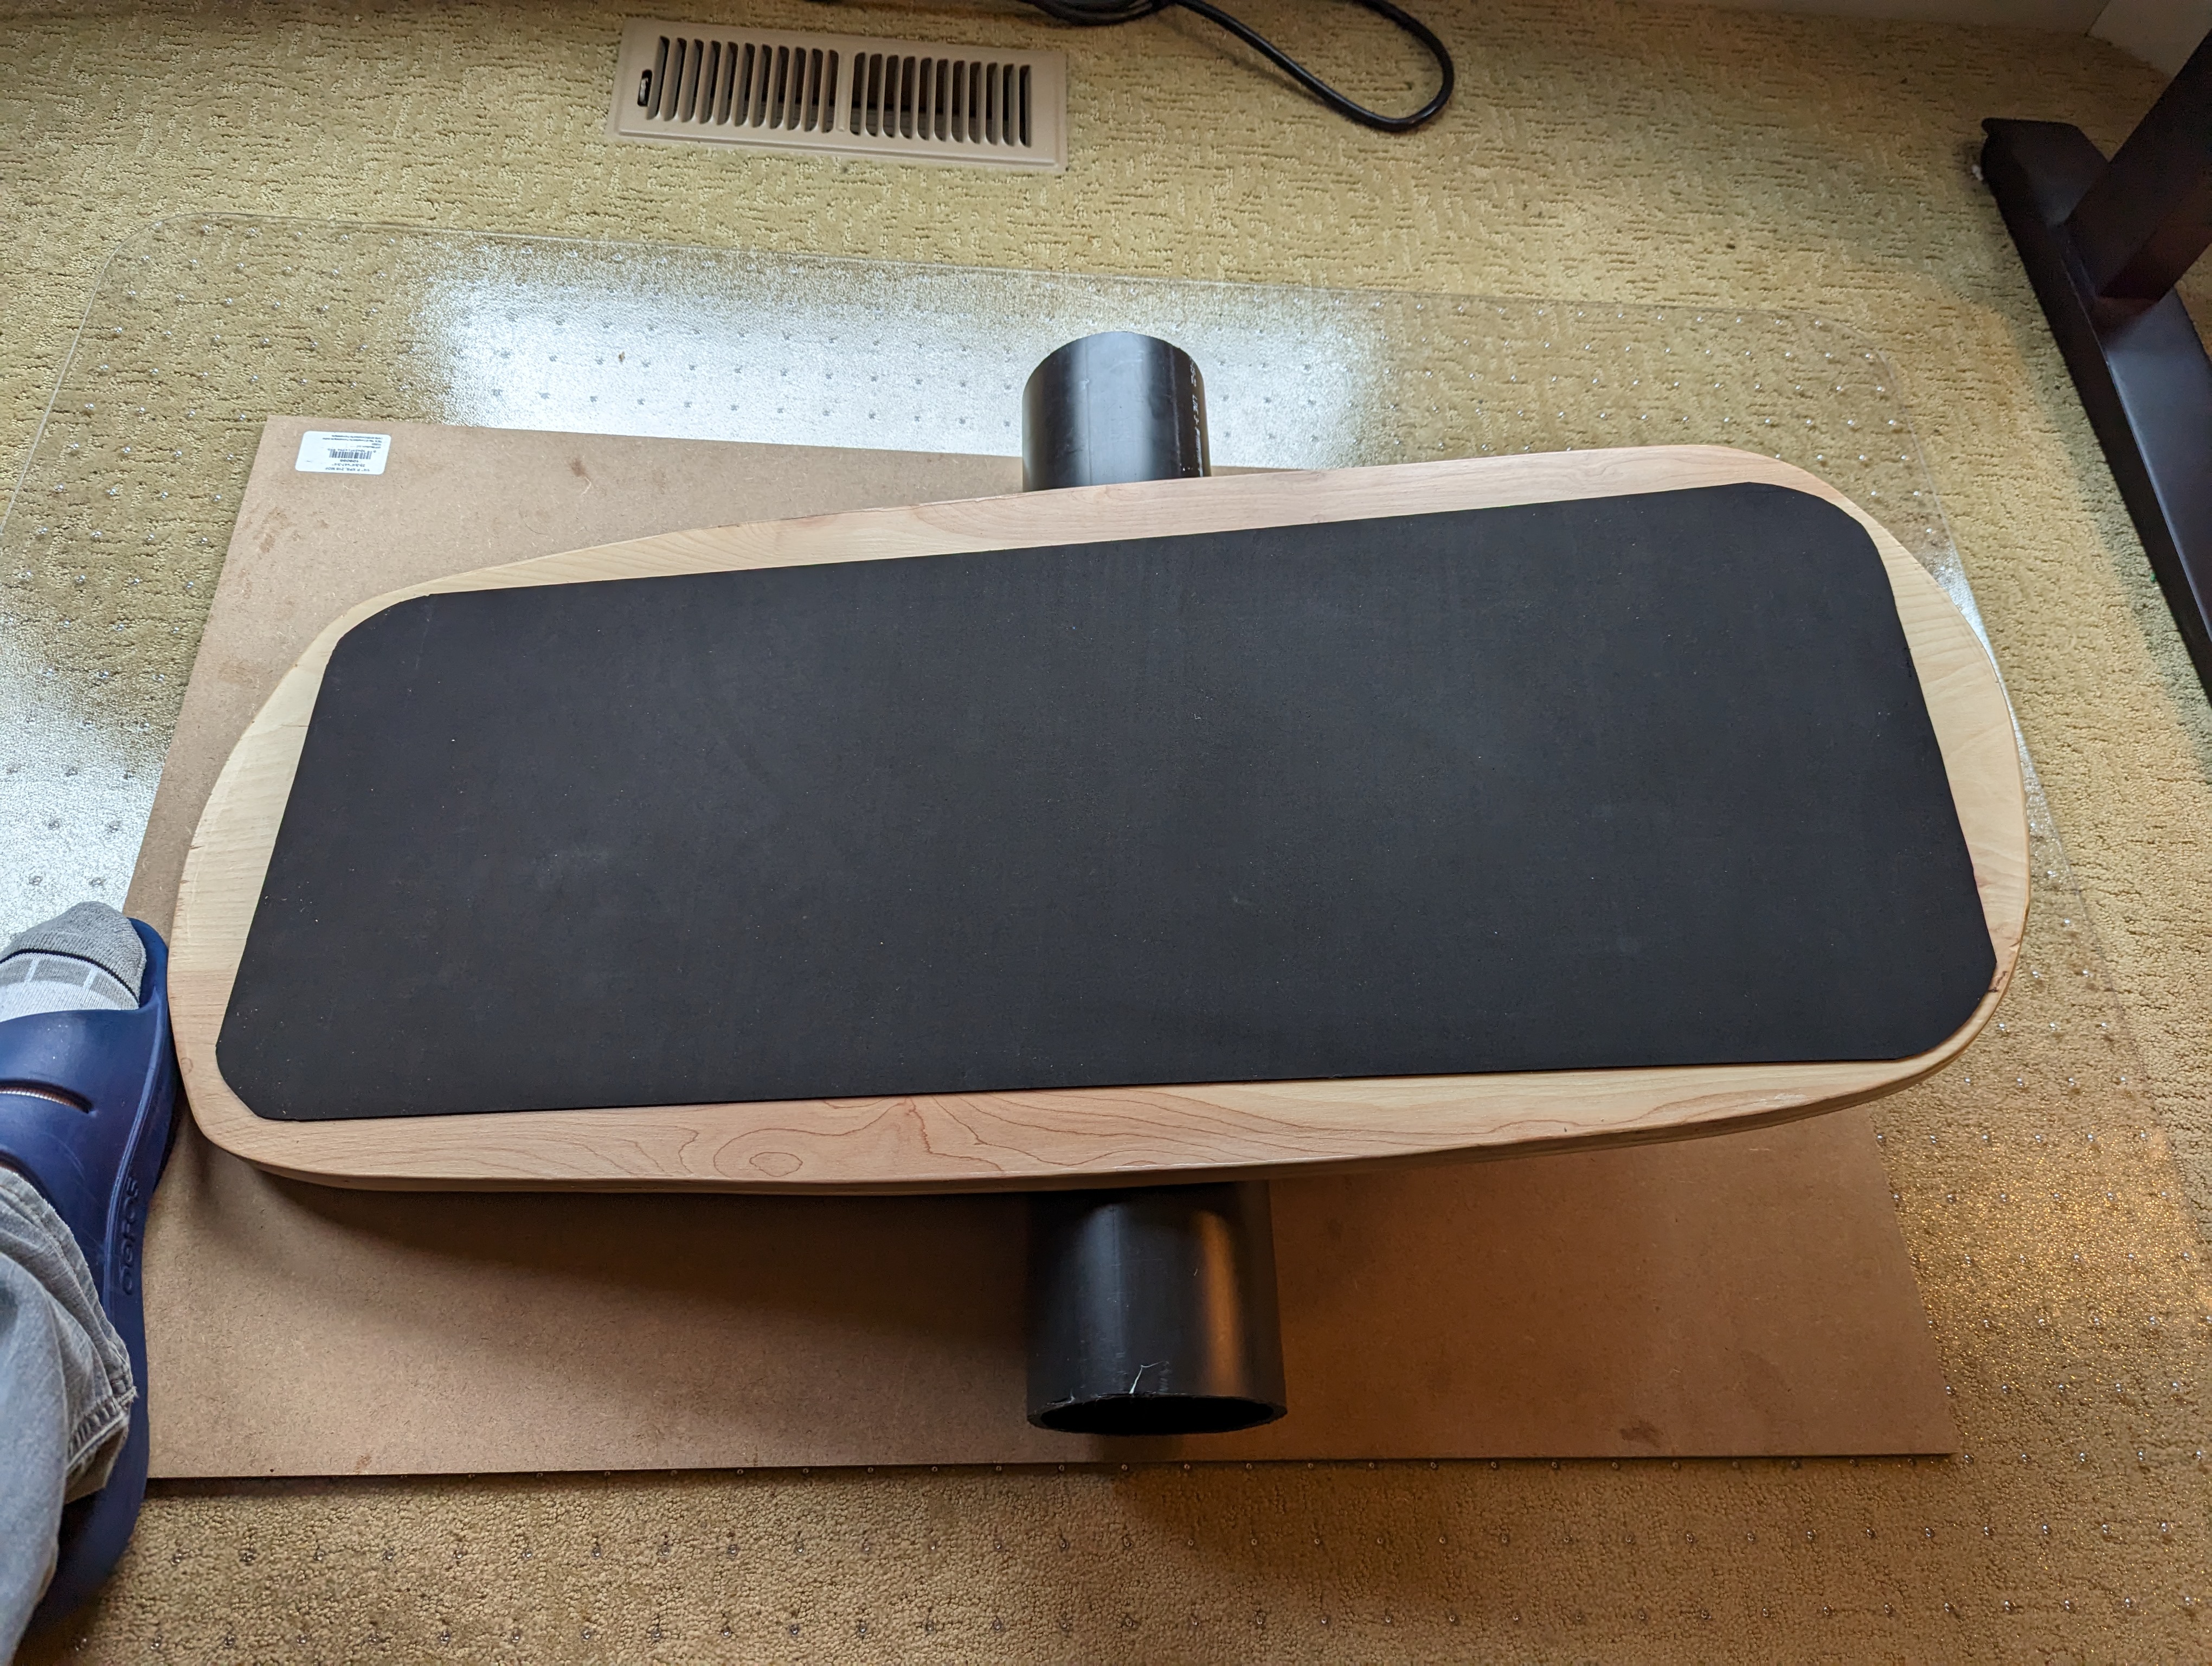
And a double roller option:
And here’s a demo of how it works:
Materials needed
Here’s what you’ll need:
- Birch plywood, ¾ inch, 2 feet by 4 feet size. (~ $40). Why Birch? Many other wood options would also work, but Birch is strong and seems to work well. If you can get a smaller piece of plywood for your board, go for it. The plywood should match your intended board size. (2 feet by 4 feet is a standard size at Home Depot.)
- Plywood floor (to roll on). ¼ inch, 2 feet by 4 feet. (~ $20) This will replace your carpet floor. It’s only needed if you’re rolling on carpet (or on an office mat you don’t want to crack). If you’re already on a hardwood floor of some kind, you can skip this.
- 4” PVC pipe: Black 4” inch PVC pipe. Comes in 10-foot lengths. (~ $50). You can also buy two pre-cut 2-foot pieces for the same price as a single 10-foot length. I’m not sure why the pre-cut pieces are so much more expensive (you get 4 feet instead of 10 feet for the same price), but it’s not hard to cut PVC. If you can transport a 10-foot plastic pipe (it fits in a minivan or truck), this is preferable. You can also probably request the hardware store to cut it.
- Saw: Regular saw (the same you’d use to cut wood). (~ $25). You’ll use this to cut the 4” PVC pipe.
- File: A metal file to smooth out the PVC pipe after you cut it.
- Pencil: Used to trace the shape of the balance board on the wood.
- Tape measure: Used to measure the shape on the wood.
- Jigsaw: Used to cut out the wood (~ $40).
- Handheld sander: Used to smooth the wood edges after cutting it out with a jigsaw. Also gather some sandpaper (e.g., medium grit) to fit the sander. (~ $50)
- Rubber mat adhesive (optional): Added to the top of the balance board to make it softer to stand on (~ $20)
- Polyurethane: Used to coat and protect the wood .(~ $25)
- Paintbrush: Needed to apply polyurethane to the board. Choose a wide brush. (~ $5)
- Drill or screwdriver (optional): Used to screw in the stopper blocks to the board. Also need 6 half-inch wood screws, a drill bit, and a screw bit. You don’t need a drill—you could simply use a screwdriver in this step. But Birch wood is fairly hard and you’ll need a strong hand.
- Protective gear: safety goggles, protective gloves (leather), ear plugs. Basic safety gear when working with a jigsaw and sander (power tools).
- Vice (optional). Used to hold PVC pipe while you cut it. You can also skip this and just ask someone to sit on the pipe to hold it in place while you saw it.
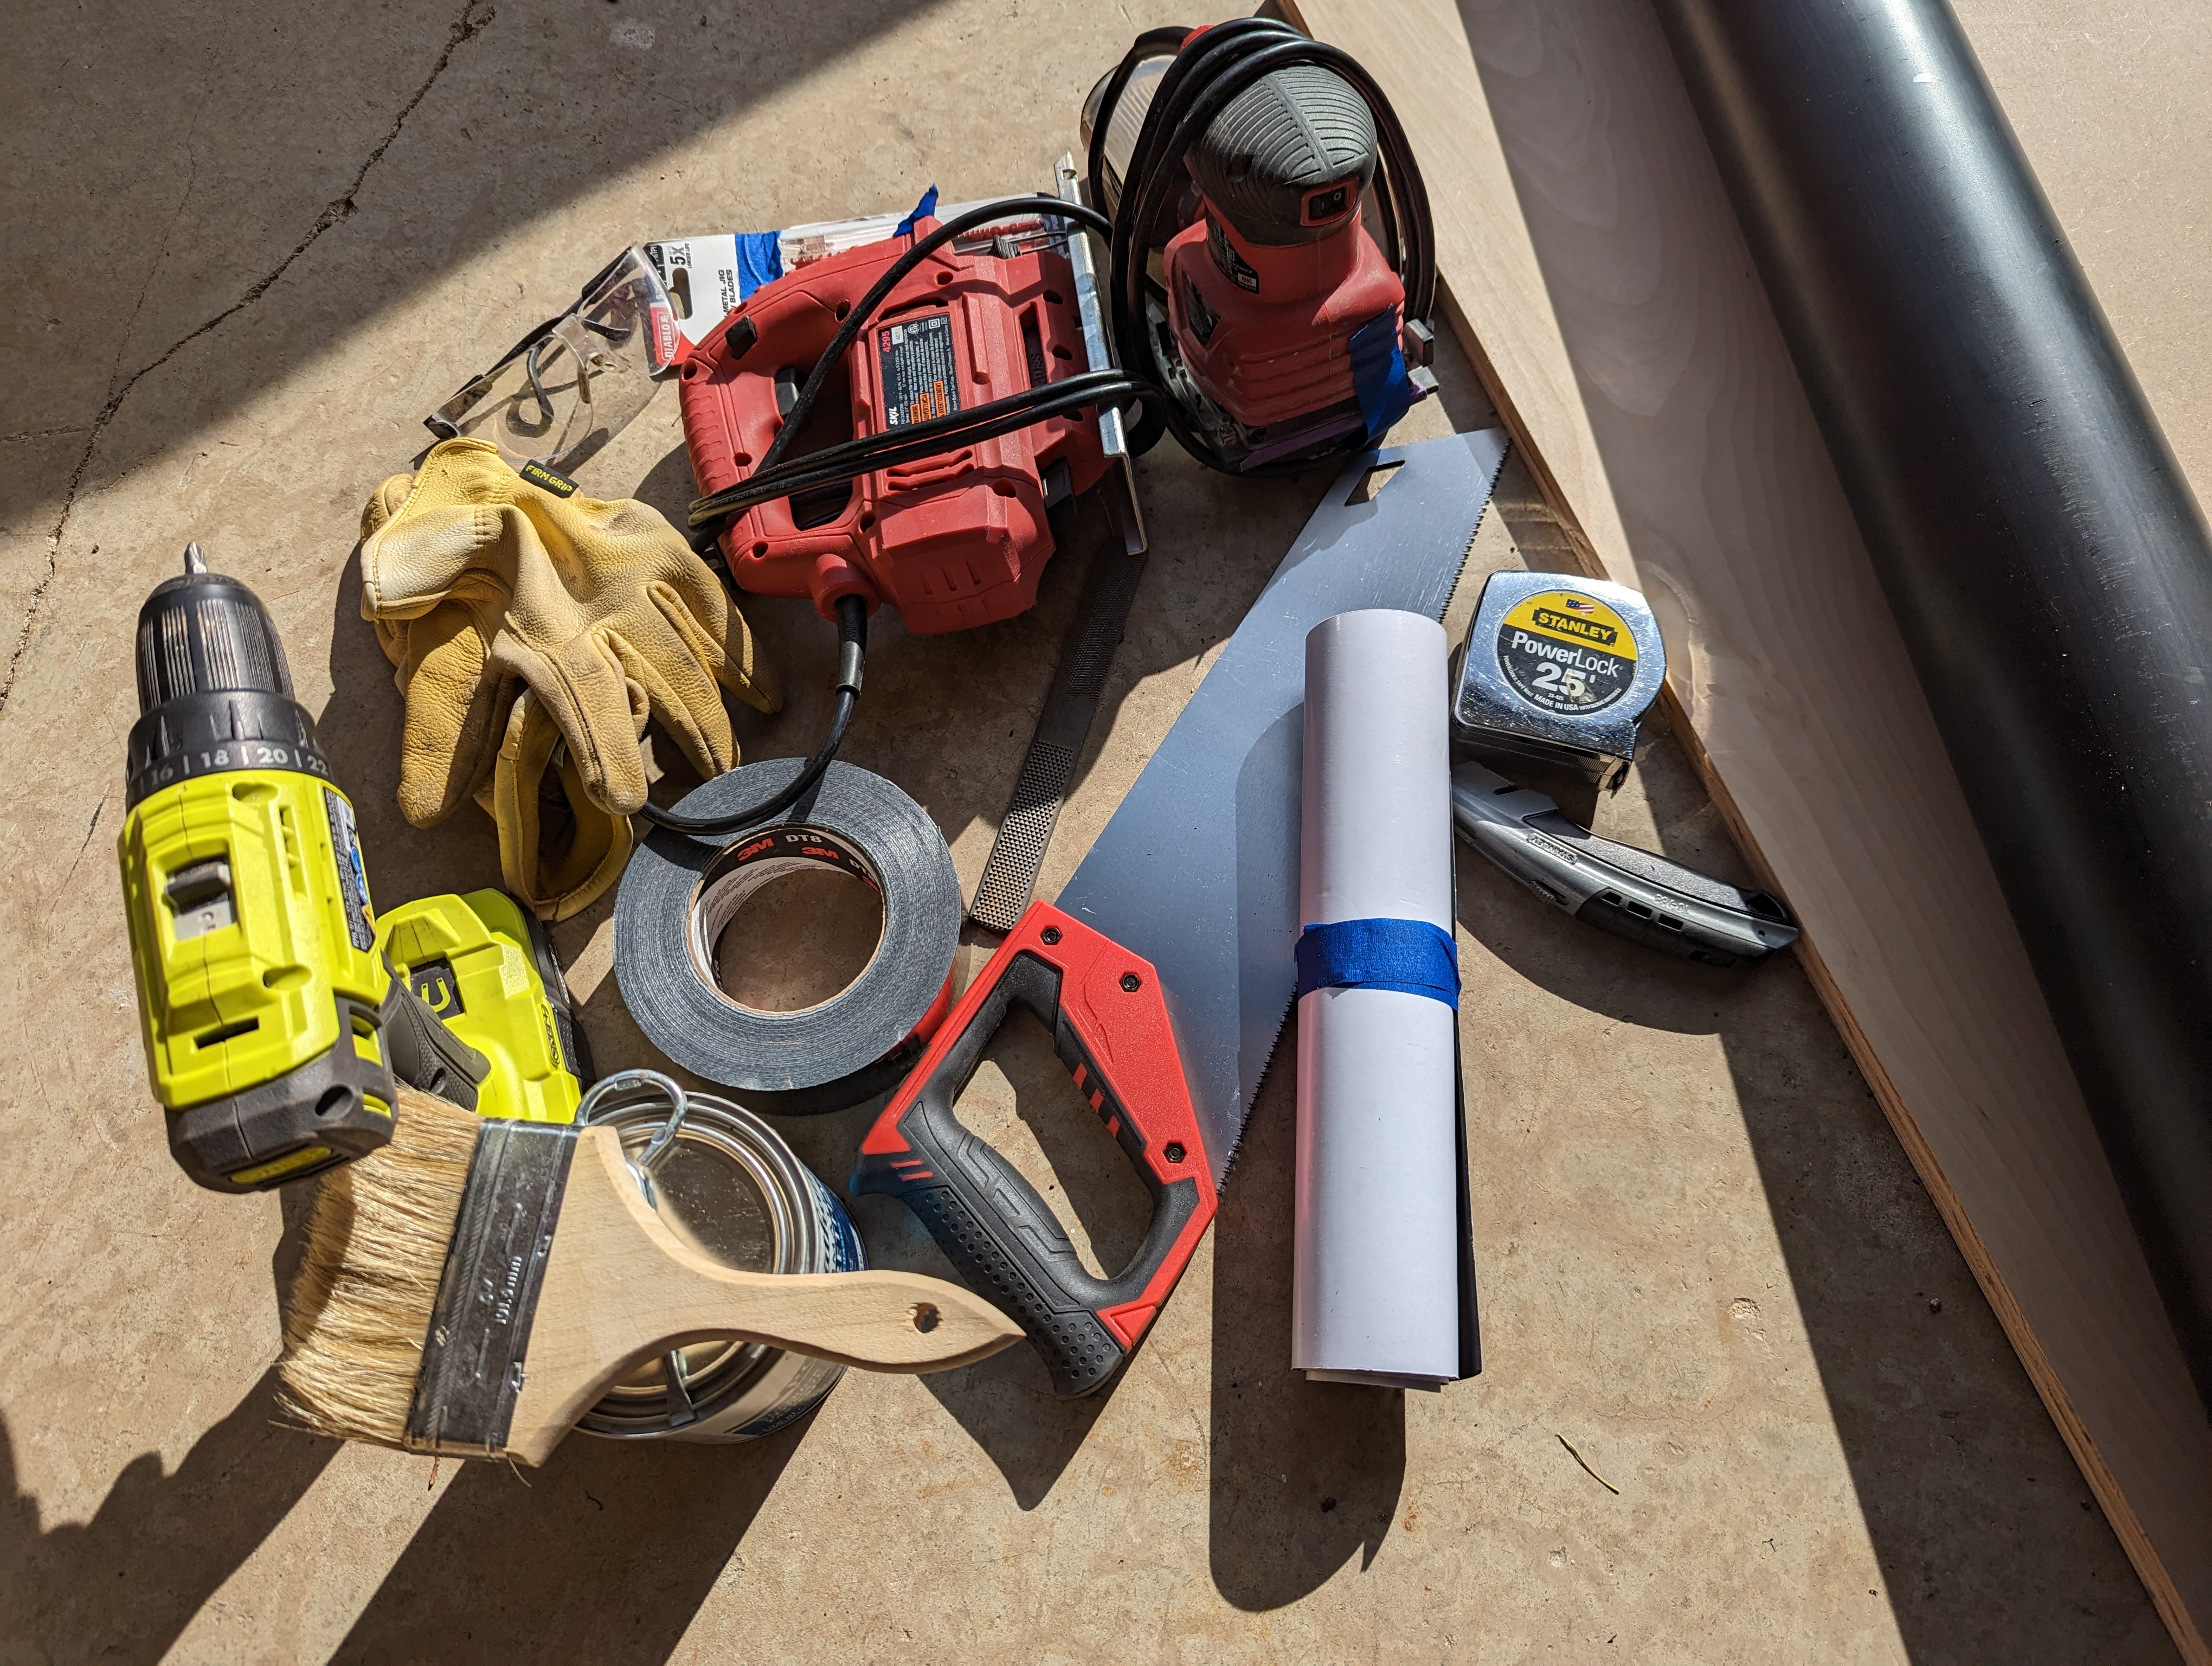
Here’s a picture of many of these supplies gathered together:
Buy vs build
At this point, you might be adding up the costs of the materials and conclude that it will cost about $300 to build your own balance board, so it would be cheaper to spend about $200 to buy a pre-made balance board. That’s a rational choice. But if you already have some of the above supplies (such as a jigsaw and sander), the price is comparable. If you don’t have many of these tools, they’ll come in handy for other home projects.
Or maybe you’re just the DIY type who likes to build their own—it is kind of fun to build these. The process is pretty basic, even for someone who isn’t handy in a workshop.
Another benefit of building your own is having the two-roller option, which you might enjoy as an alternative to the single roller. No pre-built balance board I’ve seen comes with two rollers. I quite like the two rollers. It gives you a lot more stability when standing and typing. Almost none of the companies that sell balance boards offers the option to buy a standalone roller.
Additionally, when you build your own, you won’t have the regret of knowing you spent nearly $200 buying a piece of wood that sits on top of a PVC pipe. That said, if you buy a balance board, you may be able to change the position of the stoppers. However, I didn’t find that feature useful with a standing desk.
Standing desk use vs surfboard training use
Most balance boards seemed geared toward surfboard balance training. As such, many balance boards mimic the shape of surfboards or have smaller rollers intended for more on-board maneuvering. I’m not a surfer, just a tech worker tired of sitting all day. I’m using the balance board as a periodic alternative to standing. That use case might influence my approach here, as I prefer a wider board with longer rollers.
Step 1: Gather the materials
Gather the above listed materials. You’ll probably need to go to a hardware store (e.g., Home Depot, Lowes, Ace Hardware) to gather most of the materials. (If you can find a cheaper place to get the wood or supplies, go for it.)
Here’s what ¾ inch Birch wood looks like:
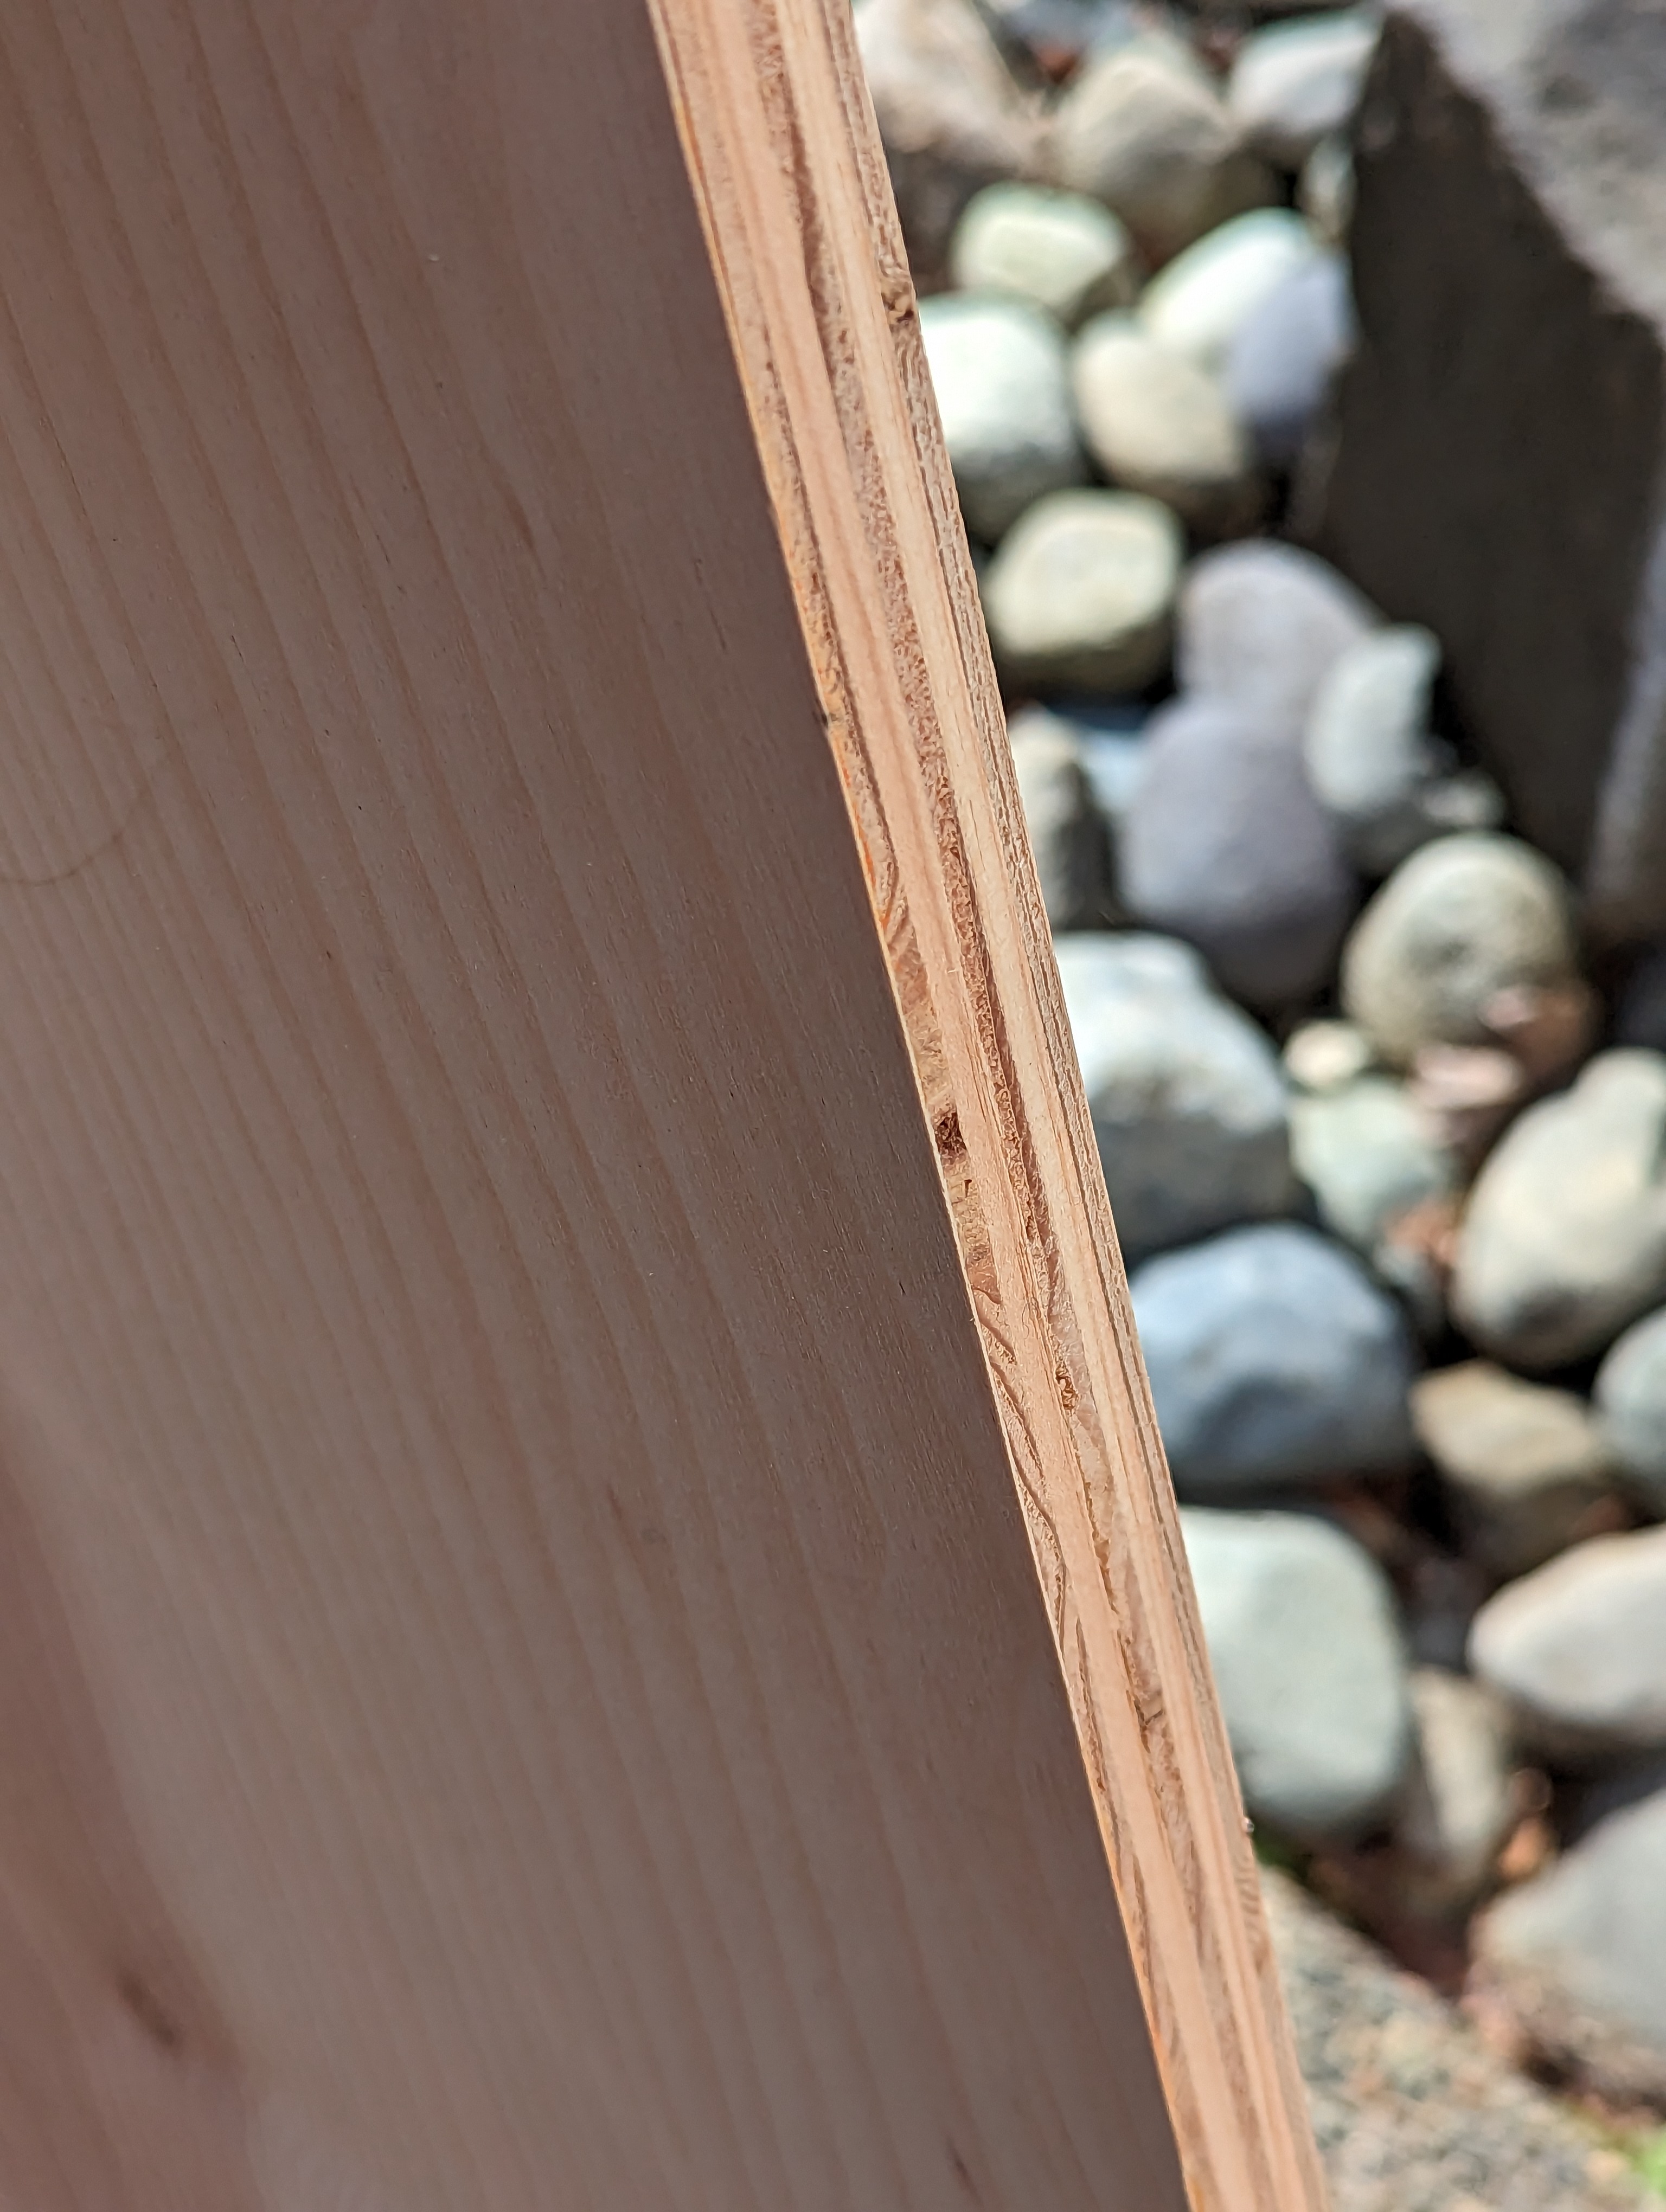
You can use other types of wood. In a pinch, you could even look for a wooden shelf around your house that you could experiment with as a first step (this is what I did).
Here’s the ¼ base:
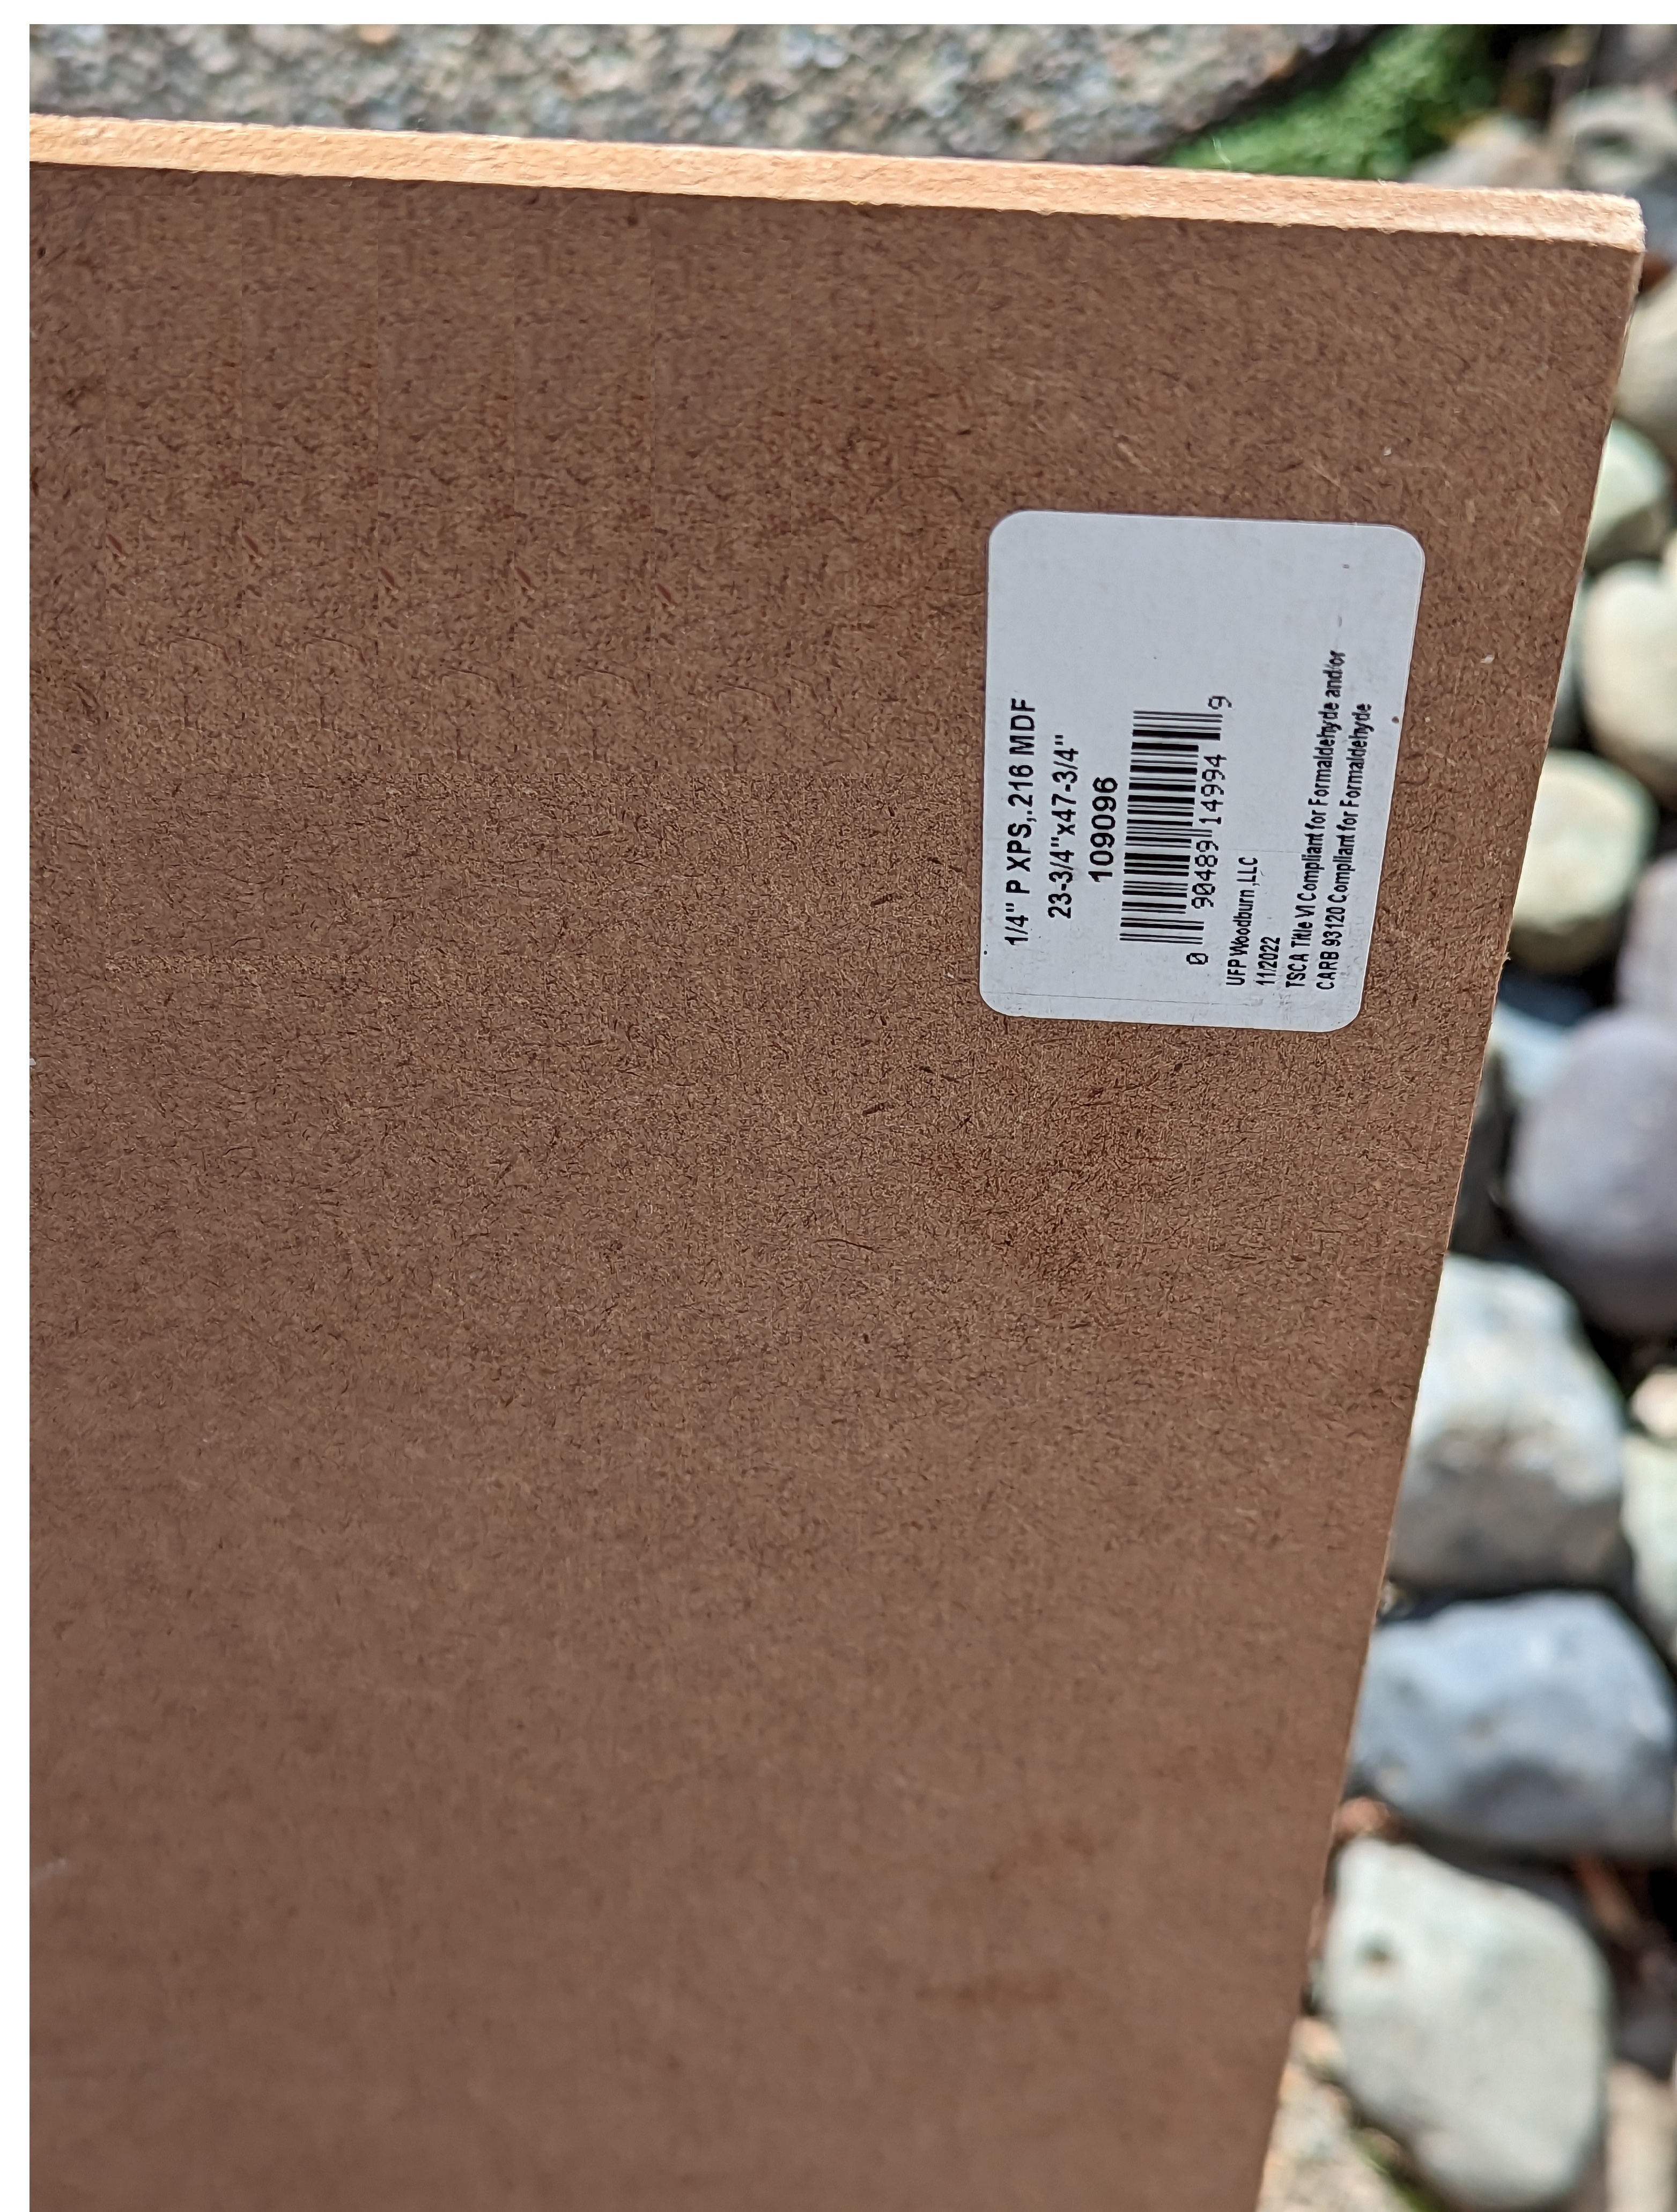
The base material doesn’t much matter, but keep in mind that it should be smooth and hardened in some way. You’ll be moving this base around (if you switch from standing to sitting frequently), so keep it lightweight. I also cut off about a foot of the length to keep it shorter and easier to move around.
I place this wood base on top of a plastic office mat. You might be able to roll directly on the plastic mat, but when I did this on a previous, older mat, it cracked in various places.
Here’s the 4-inch PVC pipe:
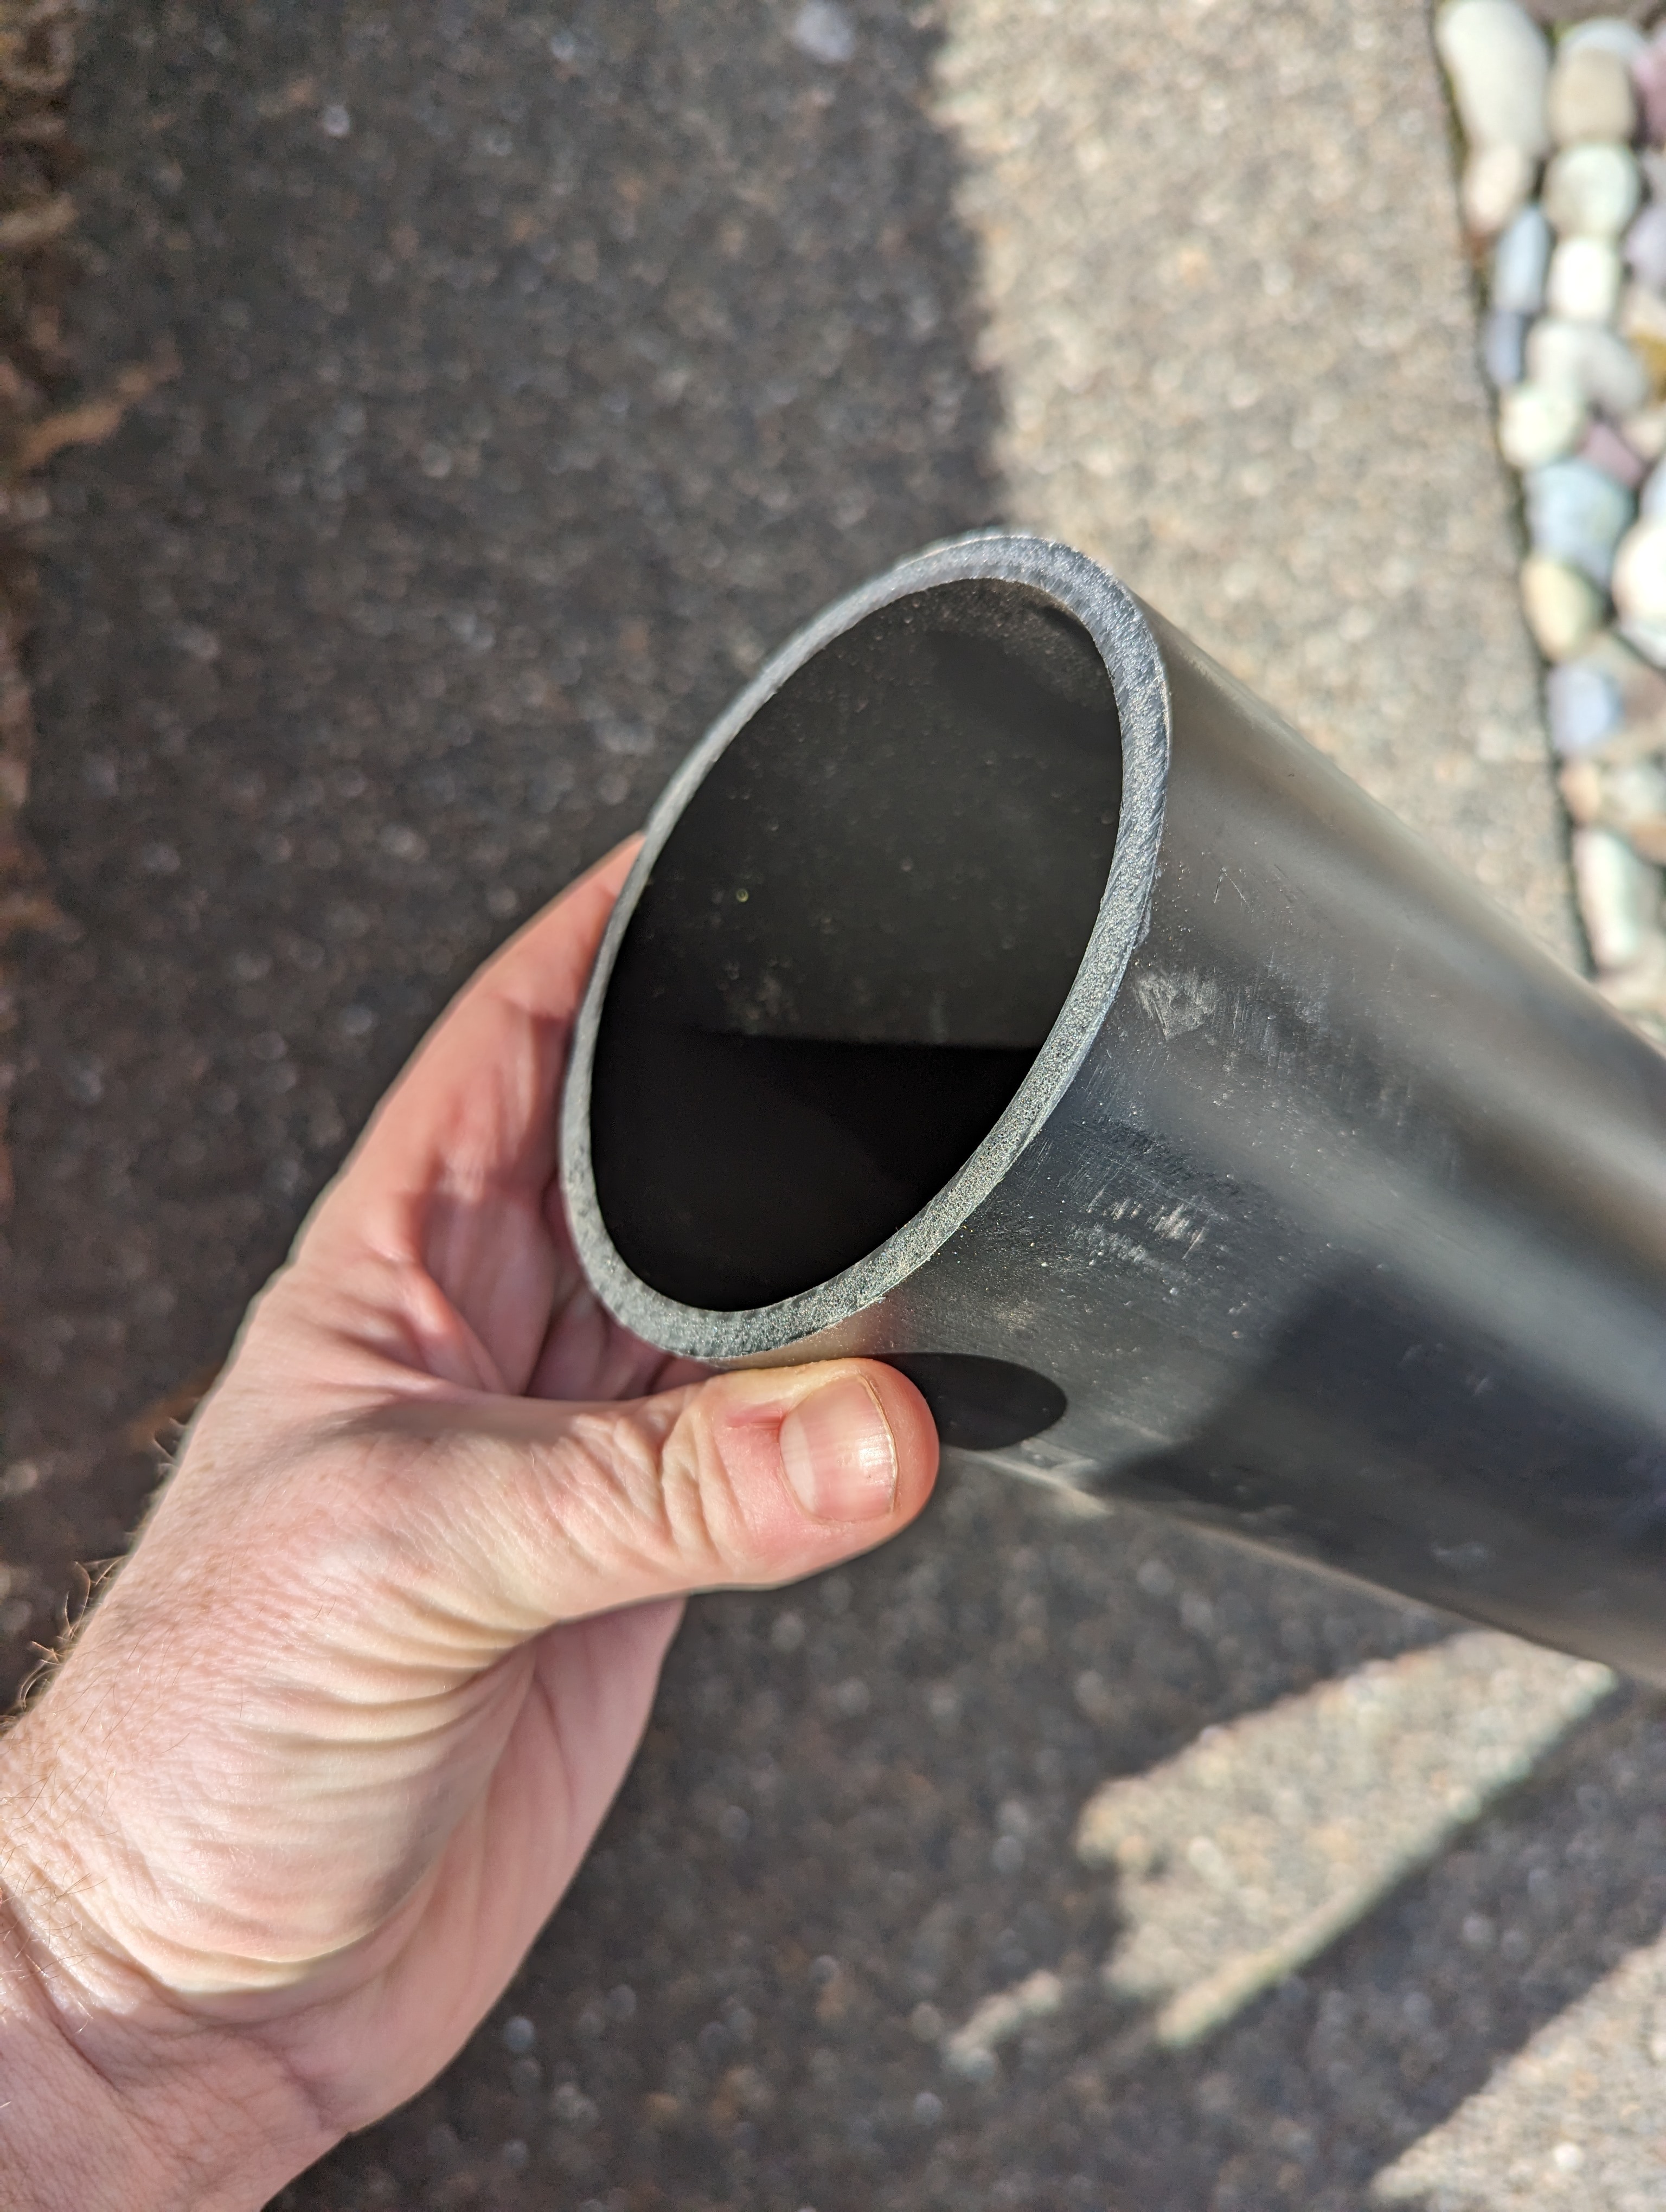
You could also use a 3-inch PVC pipe, which will definitely have less rocking motion and might be more suitable for office standing. The wider the pipe, the more difficult it is to balance. Four-inch pipe seems to be a standard for most balance boards.
At my Home Depot, the PVC pipe aisle offers pre-cut 2-foot pieces for sale. But they are quite expensive compared to the 10-foot piece. I initially bought the 2-foot pieces, thinking a 10-foot PVC pipe would be too hard to transport and cut, but later I changed my mind, returned the two-foot pieces, and got the 10-foot piece. The 10-foot piece is definitely the way to go, as it costs half as much (for the length you’re getting), is light to carry, and not hard to cut.


Step 2: Cut out the balance board
Using a pencil, trace the shape of the balance board you plan to cut out. Then use your jigsaw to cut it.
As for the shape, you can find some templates here. (I’d recommend a shape similar to the Velo one on that site.) I patterned mine after the Revbalance Swell board. This is approximately 15 inches wide (at the center) and 35 inches long. Round the corners as desired.
Here’s the top of my balance board:
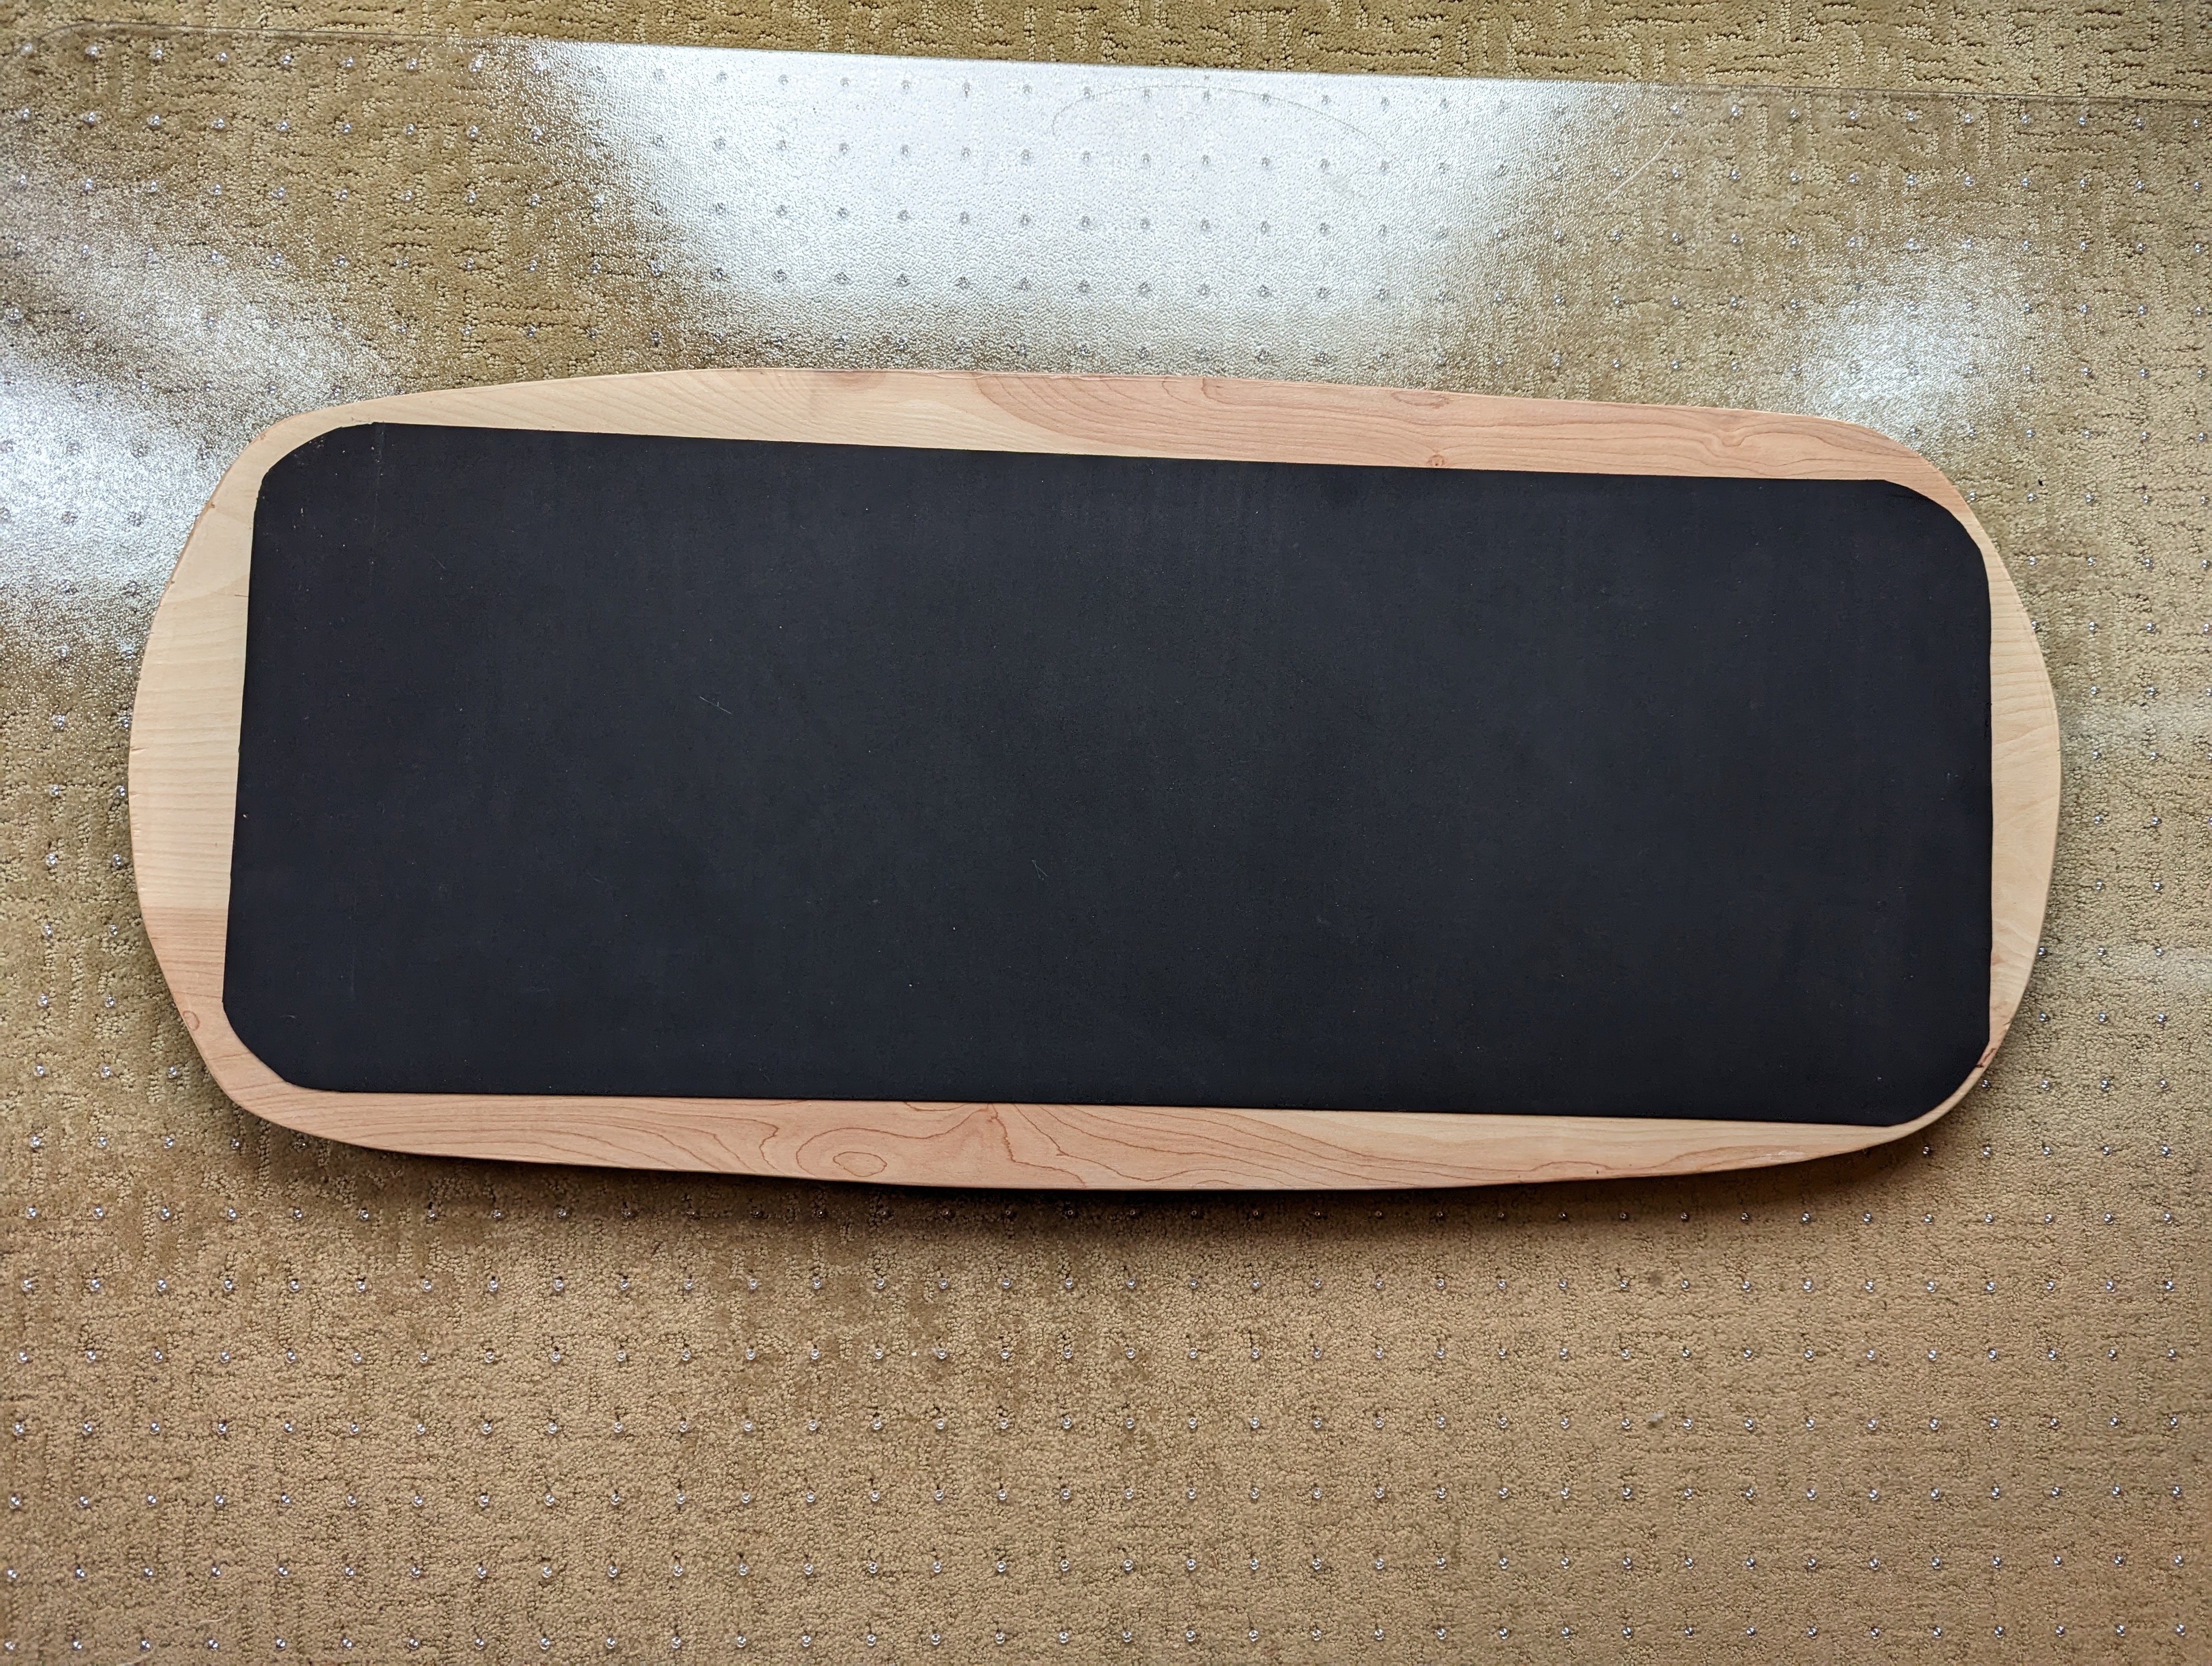
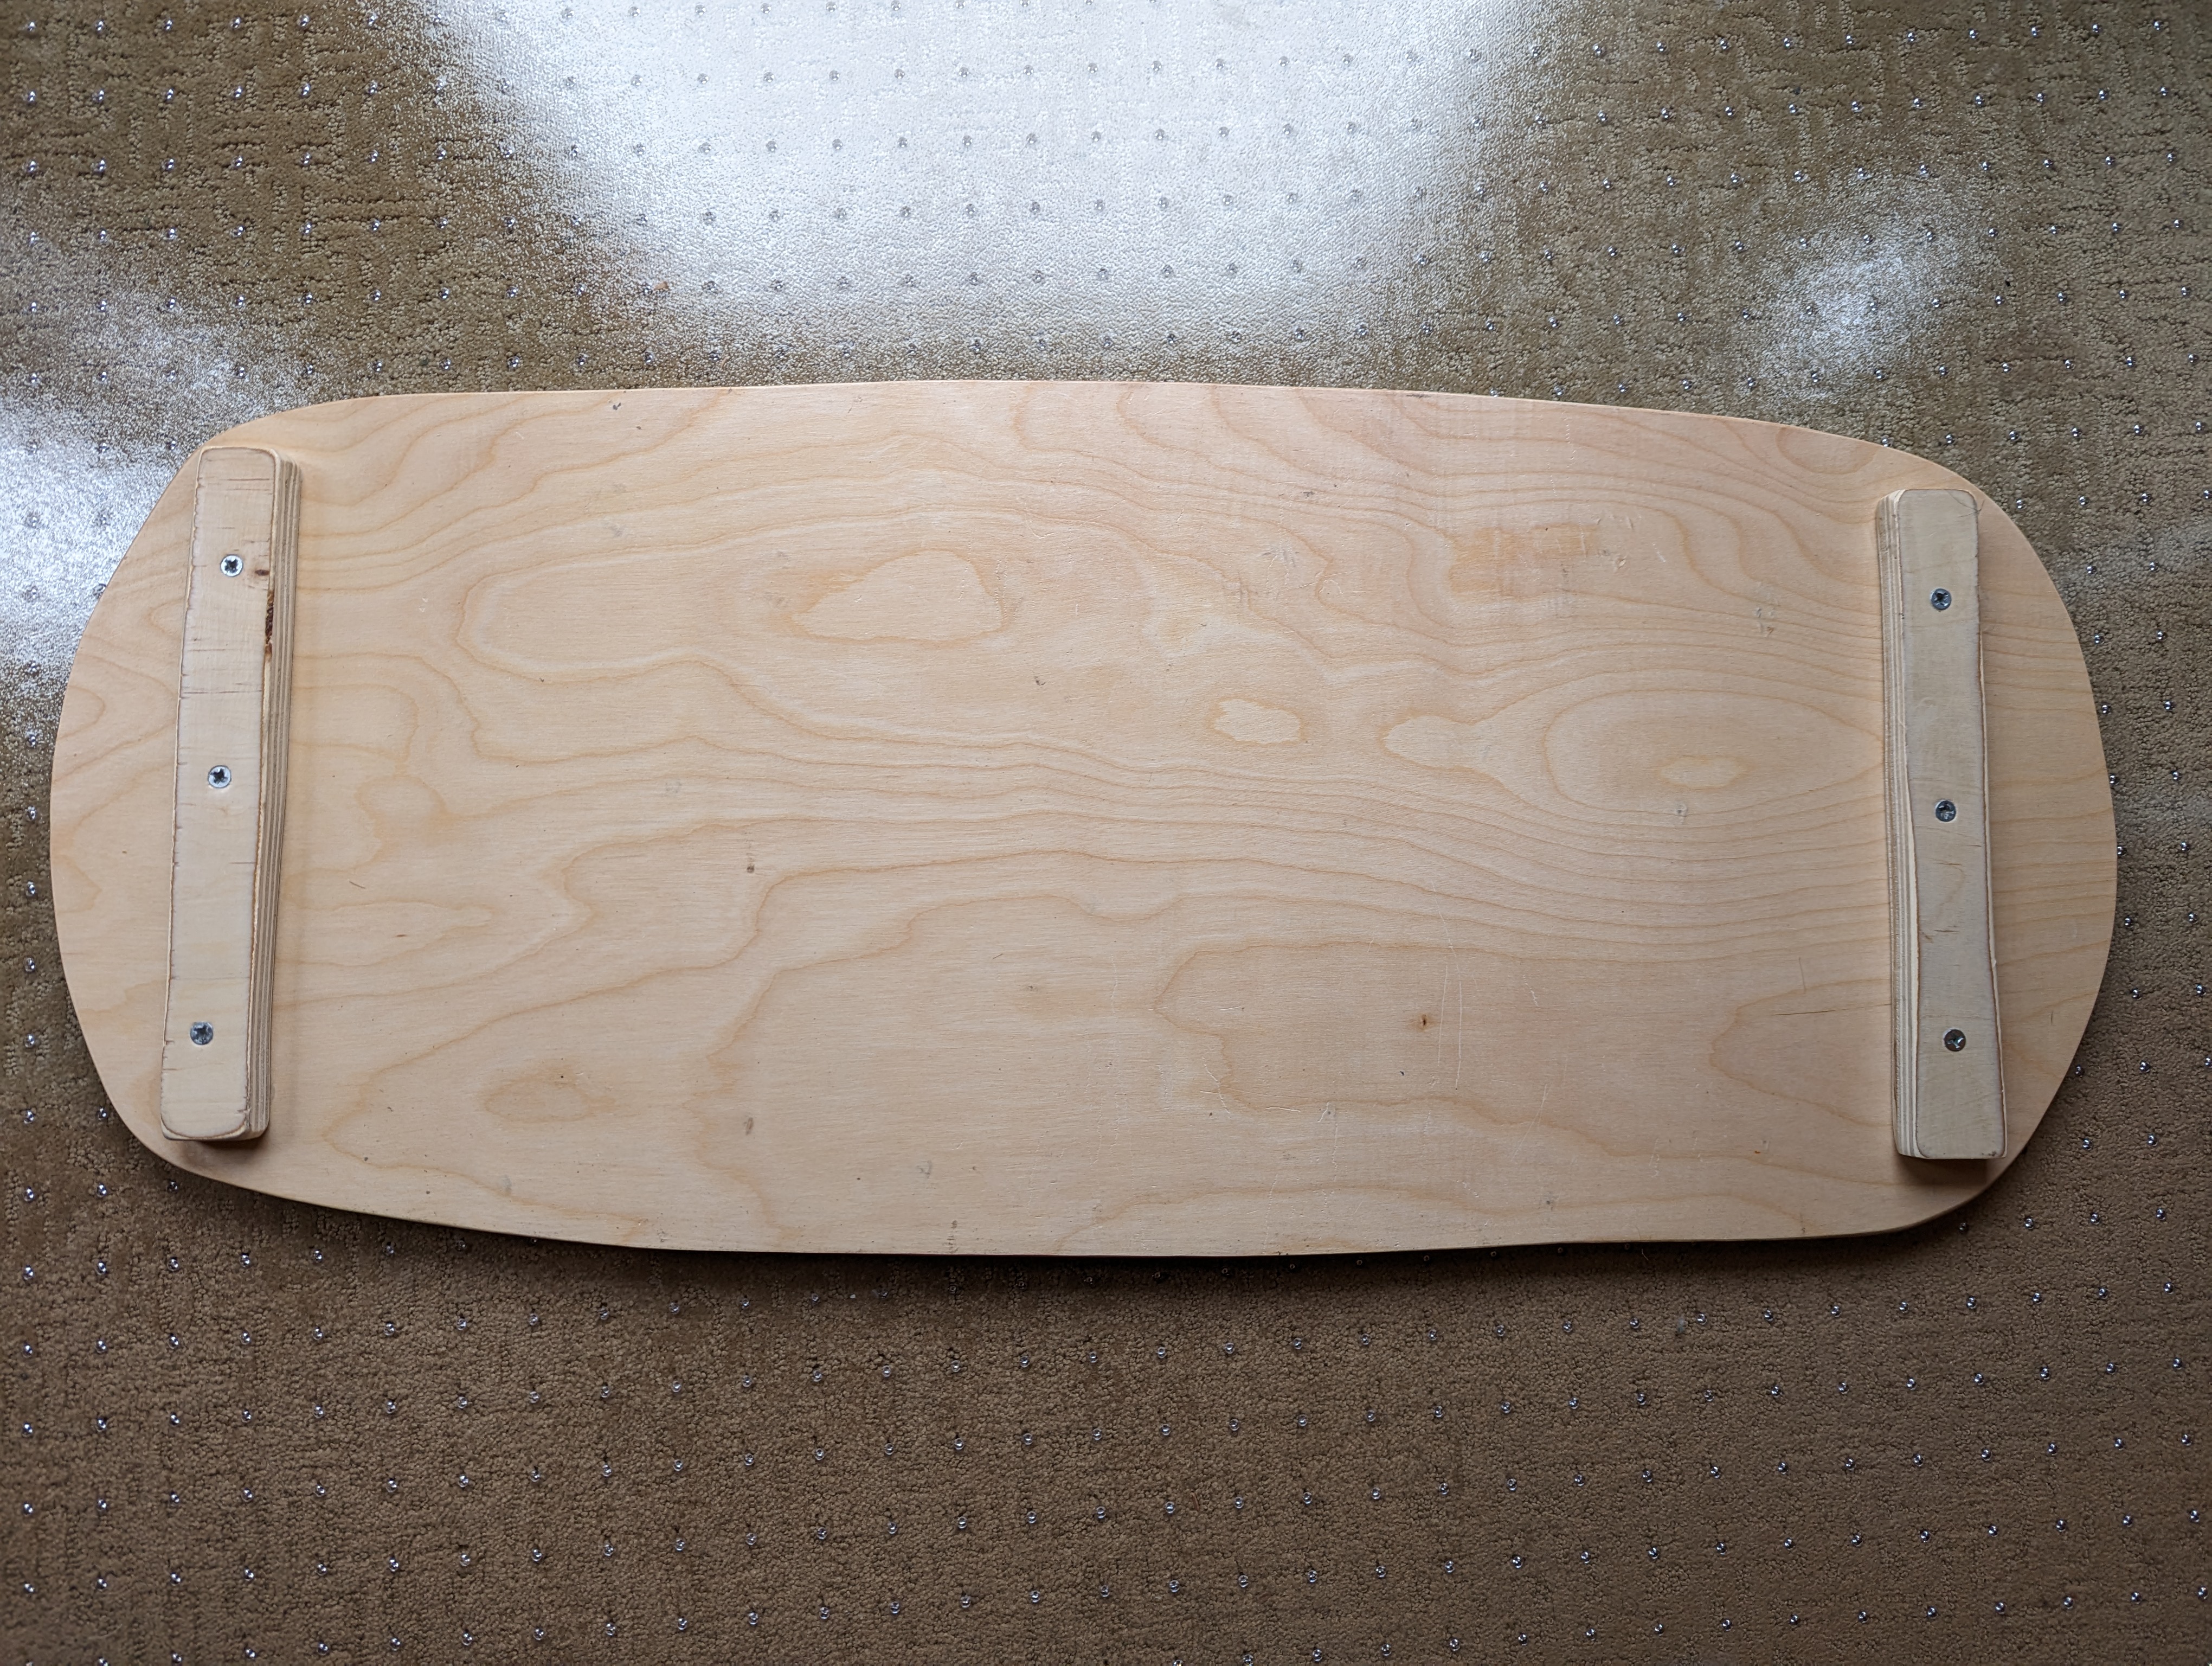
And the bottom:
As for the shape, it depends on your purpose. Most balance boards are designed for people to practice their balance (such as to learn surfing). My purpose is mainly to provide alternative standing positions while working at a standing desk. As such, a wider, longer board (more surfboard-like, shaped like the Swell) works well. A bigger board makes it easier to stand on for longer periods of time. With a larger board and a longer roller (2 feet), the roller is less likely to become out of alignment. More surface area means more wiggle room for the roller to move around without becoming misaligned.
In contrast, smaller boards that are skateboard-like in shape aren’t as comfortable to stand on long-term. I started out with the Revbalance 101 v2 board, but I much prefer the larger board.
The Indo Board Pro has a 42” x 15” deck with an 8.5-inch roller. I’m tempted to experiment with this larger size, but I also realize that the larger size will make it more unwieldy to move around and store. The 35” x 15” size seems perfect so far.
In general, if your purpose is similar to mine (for standing desks), don’t worry too much about the shape of the board. Basically, a large rectangular shape with rounded corners will work great. You don’t need to fashion the ends in any special way other than to round the corners a bit. Make it symmetrical, and keep it wide and long.
After you cut out the balance board, use a sander to sand the edges.
When you’re using a jigsaw, make sure you use protective gear including safety goggles, ear plugs, and leather gloves. Put the board on a workbench or stabilize it between two chairs.
Step 3: Add the stopper blocks
Cut two rectangular pieces (about 1.5-inch wide and 11 inches long) to function as stopper blocks at the ends of the board. The exact length of the blocks depends on the shape of your board. The stopper blocks will keep the board from sliding too far sideways. Additionally, the stoppers make the board easier to carry.
Screw 3 wood screws into each of the stopper blocks to affix it to the balance board. Pre-drill the hole slightly before screwing in the screws. Make sure you select screws long enough to go through the stopper blocks and enter the balance board, but not too long to poke through the board (about 1” screws).
As for where the position the stopper blocks, I positioned mine as close to the ends as possible. Many surfboard-style balance boards offer a lot of different positions and options. Positioning the stopper blocks closer together restricts the amount of side-to-side motion possible on the board.
Step 4: Coat the board with polyurethane
Coat the wood with polyurethane. The polyurethane step will involve putting on multiple light coats every couple of hours. Light coats ensure that the polyurethane doesn’t pool up or drop in places.
Don’t try to put on a super thick coat to reduce the number of coats needed, as you’ll regret it when you see all the drips and liquid pooling.
I put a light coat on one side of the board, waited an hour, then flipped it over and put a coat on the other side. Waited an hour, then flipped and bushed another coat. And so on about 3 times on each side.
If you’re artistic (or have a pre-fab vinyl design), add the design to your board prior to coating it with polyurethane. You can also use patterned grip tape later, if you want. However, I covered the top of my board with a thin rubber mat, so such a design would only make sense on the bottom.
Step 5: Cut the PVC pipe
Using a regular saw, cut the PVC pipe into 2-foot lengths. (You don’t need to cut more than a couple of two-foot pieces.) You might have a vice to hold the pipe in place or some other setup—if so, great. I simply laid the pipe between two chairs and asked my kid to sit on the pipe on one side while I sawed it. (Without some way to hold down the pipe, it will move all over the place.)
Getting a clean cut on PVC is a bit tricky. Don’t use a hacksaw, as the blade will angle all over the place (as I learned on my first attempt). Try to cut evenly straight down with a saw, without angling. If the cut isn’t more or less straight, it will be hard to rest the balance board on its end.
After cutting the pipe, use a file to smooth the edges a bit.
Step 6: (Optional) Apply rubber mat to the board
This step is optional, depending on your preference. Add a thin rubber adhesive mat (such as this one) to the top of the board. This might be especially comfortable if you plan to use it barefoot. If not, it doesn’t matter much. Other people use grip tape similar to what skateboards use.
I usually wear Oofos sandals while standing on top of the board, so I probably don’t need the rubber mat. But I was influenced by the rubber mat on the Revbalance boards and wanted to imitate it.
It can be challenging to apply the rubber mat evenly on the board. I recommend that you use an Exacto knife (or utility blade) to even things out after putting it onto the board. Aesthetically, the shape of my rubber mat doesn’t match the shape of my board, which makes it less visually pleasing to look at. There’s plenty of room for improvement here.
One final note. If you find that the plastic PVC is too slippery on the board, you can wrap the PVC pipe with duct tape. This will create more friction with the board, which might be desirable. I tried this for a while but then removed the tape because the rollers were smoother without the tape, and I like the ability to jump-slide the board around a little.
You’re done. Enjoy your balance board.
Other notes and observations
Here are some other random notes about making balance boards:
- Perfect roundness with the PVC pipe. As you roll back and forth, you might notice that your pipe isn’t perfectly round. I’m not sure how to fix this issue. It seems that not all PVC pipes are the same; some are a little distorted. I’ve ordered a couple of a pre-made balance boards that have the same issue.
- Plastic caps for the PVC pipe. You can get plastic caps for the ends of the PVC pipe, but this will make the pipe heavier. With caps, you could fill the PVC pipe with something (e.g., sand?), but I’m not sure what this would add to the experience. It would make the PVC heavier, thus harder to move around and perhaps more stable.
- PVC pipe diameter. Why 4” PVC pipe? You could also use 3”, but the board will more easily hit the ground as you balance. You could use 5” or 6”, but this would make the balance board more difficult to stand on. 4” does seem to be the sweet spot for size.
- Rubber couplings. What about putting rubber couplings around the PVC pipe? You could buy 6 rubber couplings and put them around the PVC pipe. I saw this recommendation on a video. However, when I did this, the rubber made strong squeaky noises and slowed down the rocking motion too much. Additionally, the six couplings cost $60, so this added to the expense considerably. (I ended up returning my rubber couplings.)
- Standing desk compatibility. Presumably, you already have a standing desk if you’re building this board for a standing office. When you stand on a balance board, you’ll need to raise the desk pretty high because you’ll be a good 5 inches taller and standing. If you buy a Jarvis desk (which I recommend), be sure to get the “three-stage frame” (an optional upgrade) that extends the full 51” in height. I’m 6’2” and needed to extend it to nearly its full height. I also have my monitor on a swing arm, which allows me to move the monitor and my line-of-sight up higher.
- Squeaky noises. If you find the balance board squeaks on the roller, you can try rubbing the roller with dryer sheets. This is how you get the squeak out of your orthotic inserts in shoes. I assume that spray-on dryer sheet liquid (which I haven’t tried) would be better. The dryer sheet method doesn’t fix the problem for more than an hour or two. My homemade balance board so far hasn’t started squeaking (but the Revbalance 101 board I initially bought squeaks).
About Tom Johnson

I'm an API technical writer based in the Seattle area. On this blog, I write about topics related to technical writing and communication — such as software documentation, API documentation, AI, information architecture, content strategy, writing processes, plain language, tech comm careers, and more. Check out my API documentation course if you're looking for more info about documenting APIs. Or see my posts on AI and AI course section for more on the latest in AI and tech comm.
If you're a technical writer and want to keep on top of the latest trends in the tech comm, be sure to subscribe to email updates below. You can also learn more about me or contact me. Finally, note that the opinions I express on my blog are my own points of view, not that of my employer.